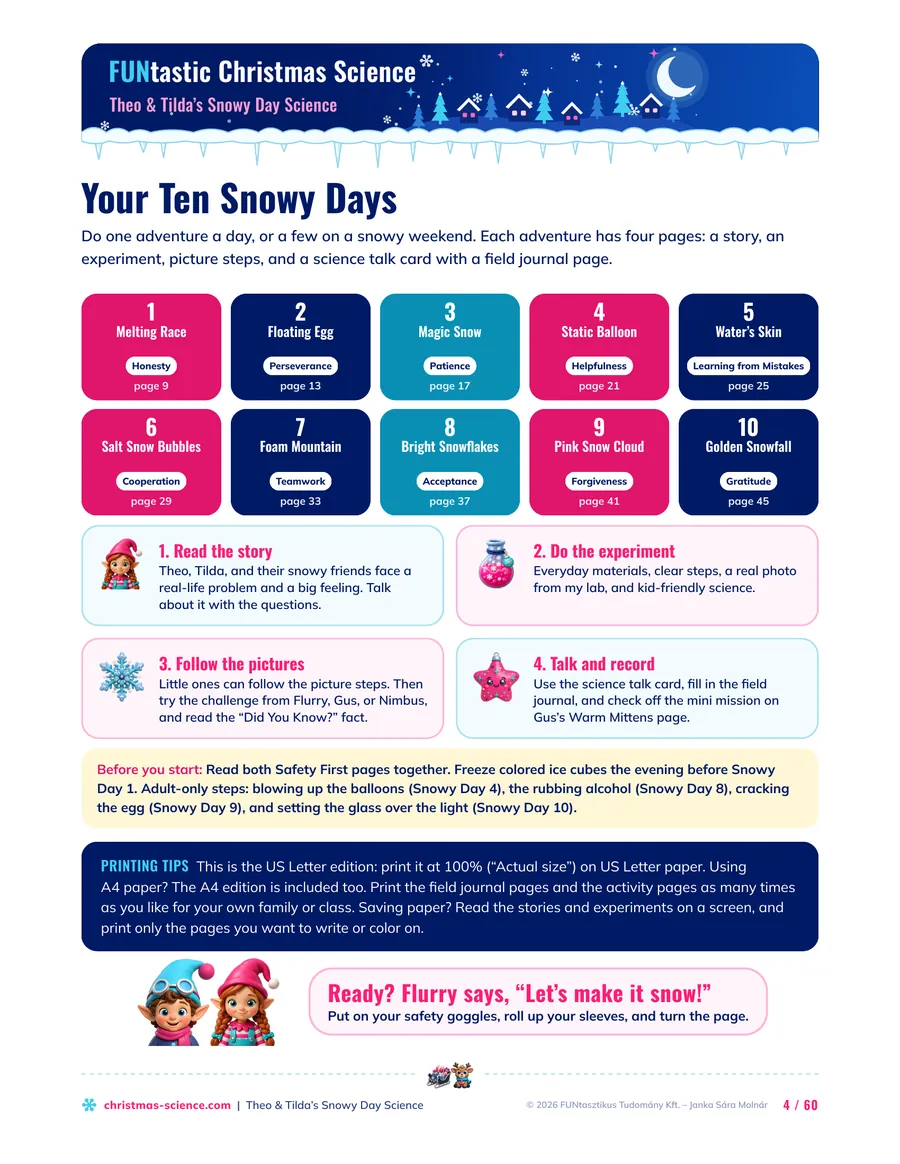
10 Winter Science Experiments for Preschoolers (No Snow Needed)
Easy snow and ice science with ice cubes, salt, and cornstarch. Every experiment comes with a read-aloud story for circle time, picture steps for little hands, and talk questions for afterward.
- 10 experiments
- Ages 3–9
- No real snow needed
- No flames, no hot water
Planning a snowy week? Save it, or share it with the teacher next door.
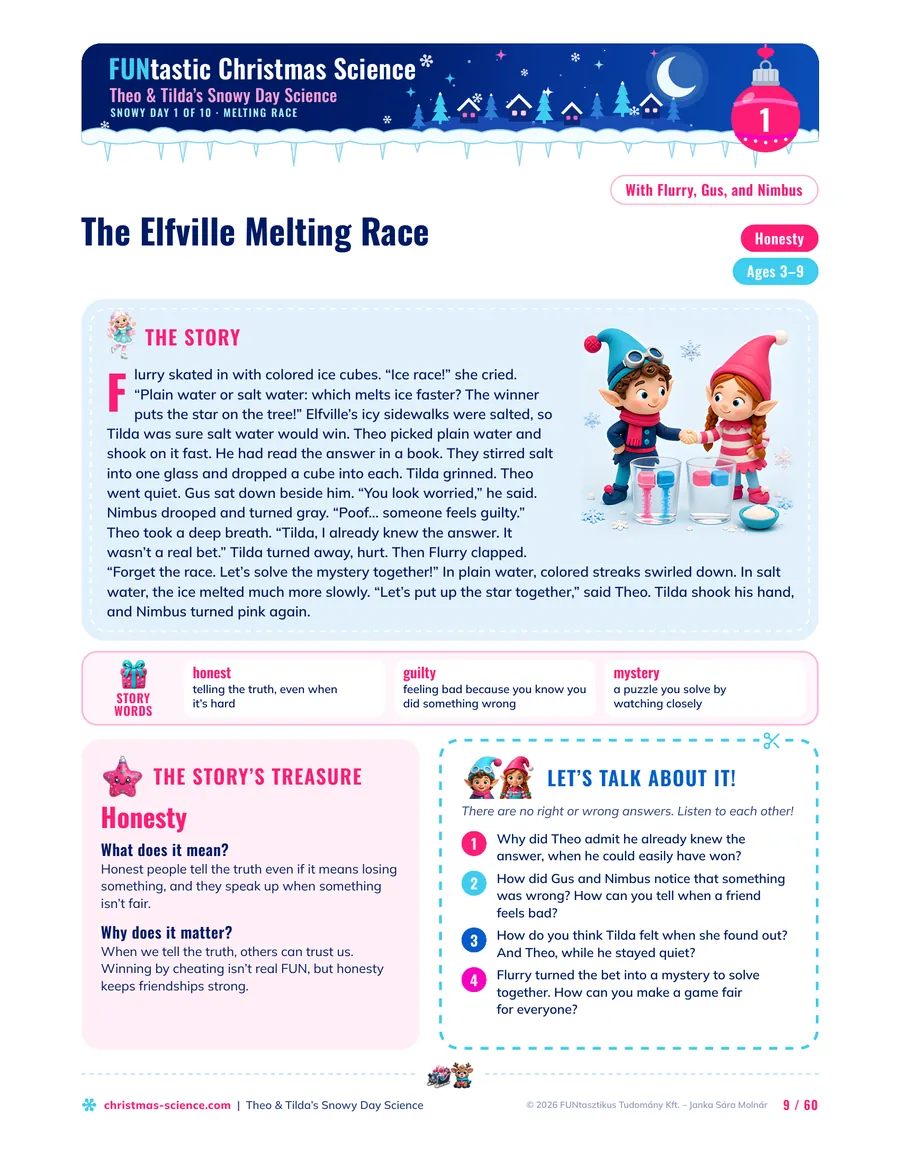
The Elfville Melting Race
Flurry skated in with colored ice cubes. “Ice race!” she cried. “Plain water or salt water: which melts ice faster? The winner puts the star on the tree!”
Elfville’s icy sidewalks were salted, so Tilda was sure salt water would win. Theo picked plain water and shook on it fast. He had read the answer in a book. They stirred salt into one glass and dropped a cube into each. Tilda grinned. Theo went quiet.
Stop here and ask your class: Which glass would you bet on? The answer is in the first experiment below, and the end of the story is at the bottom of this page.
Know a preschool teacher who is still waiting for real snow? Send this to them. None of these ten experiments needs it. Share it
What are the best winter science experiments for preschoolers?
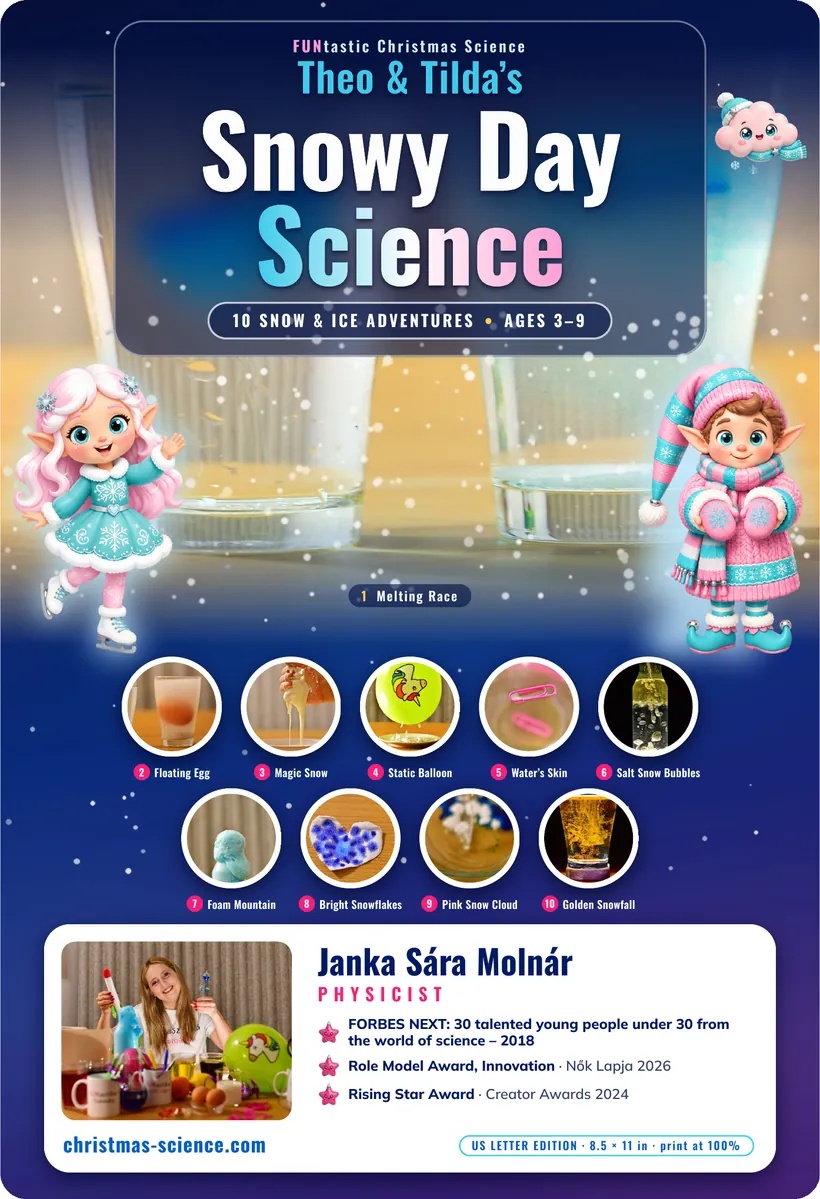
The best winter science experiments for preschoolers use ice, salt, cornstarch, and other things you already have in the kitchen. They need no real snow, no flames, and no hot water, and each one gives children something to guess, touch, and talk about. These are the ten I chose for Theo & Tilda’s Snowy Day Science, my 60-page printable snow and ice booklet for ages 3–9 ($3.99, US Letter and A4).
Melting Race
Colored ice cubes race in plain water and in salt water. The surprise: plain water wins.
Floating Egg
Two eggs, two glasses of water: one egg sinks, one floats. The only difference is salt.
Magic Snow
Cornstarch “snow” turns hard when you squeeze it and runs away when you let go.
Static Balloon
A rubbed balloon makes paper snowflake scraps jump up and cling to it.
Water’s Skin
A metal paper clip rests on top of the water, held up by water’s invisible skin.
Salt Snow Bubbles
Salt falls like snow through a layer of oil, and oil drops float back up, one by one.
Foam Mountain
Baking soda, vinegar, and dish soap build a snowy foam mountain that spills over the bowl.
Bright Snowflakes
Marker patterns on fabric or a coffee filter bloom into rings of color, ready to hang on the tree.
Pink Snow Cloud
Egg white, baking soda, and vinegar build a foam cloud that rises over the top of the glass.
Golden Snowfall
A pinch of turmeric sparkles like golden snow in a glass lit from below.
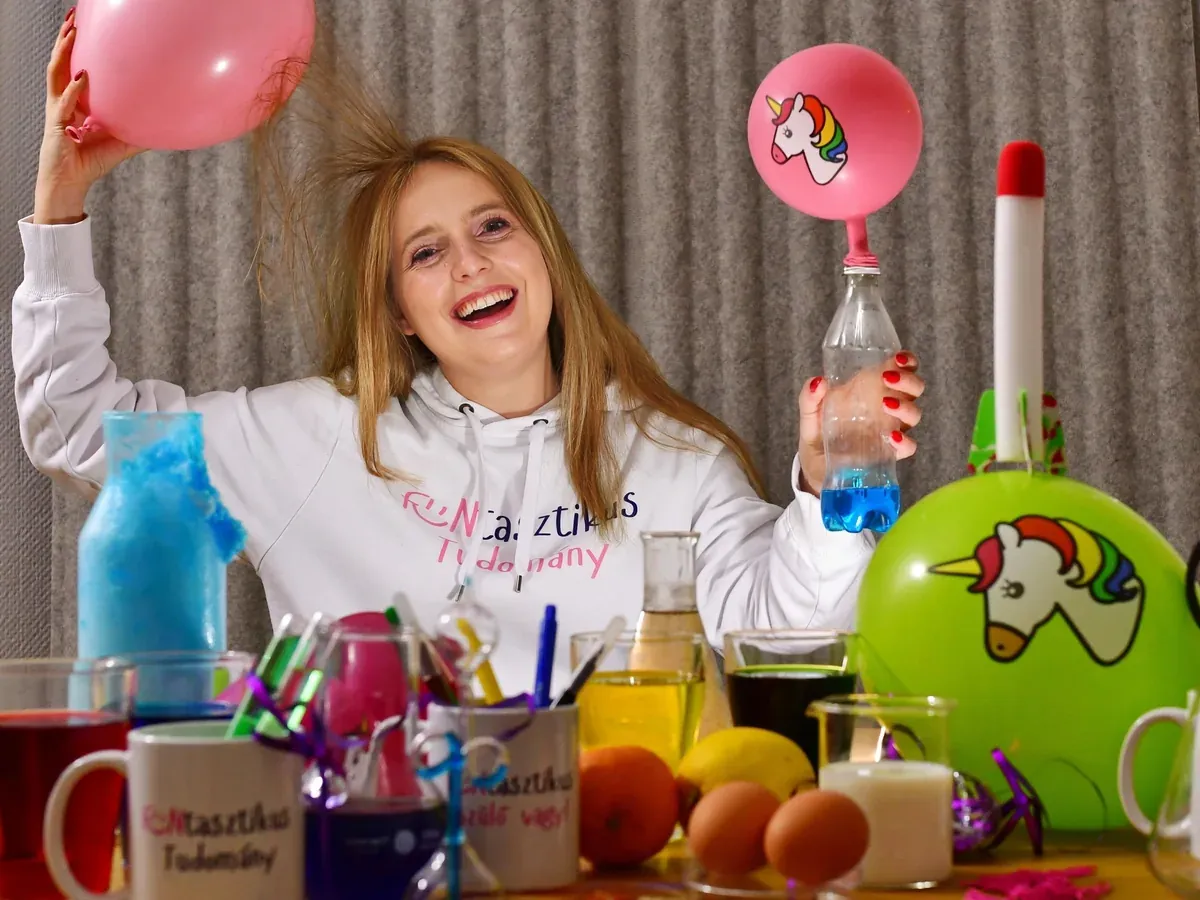
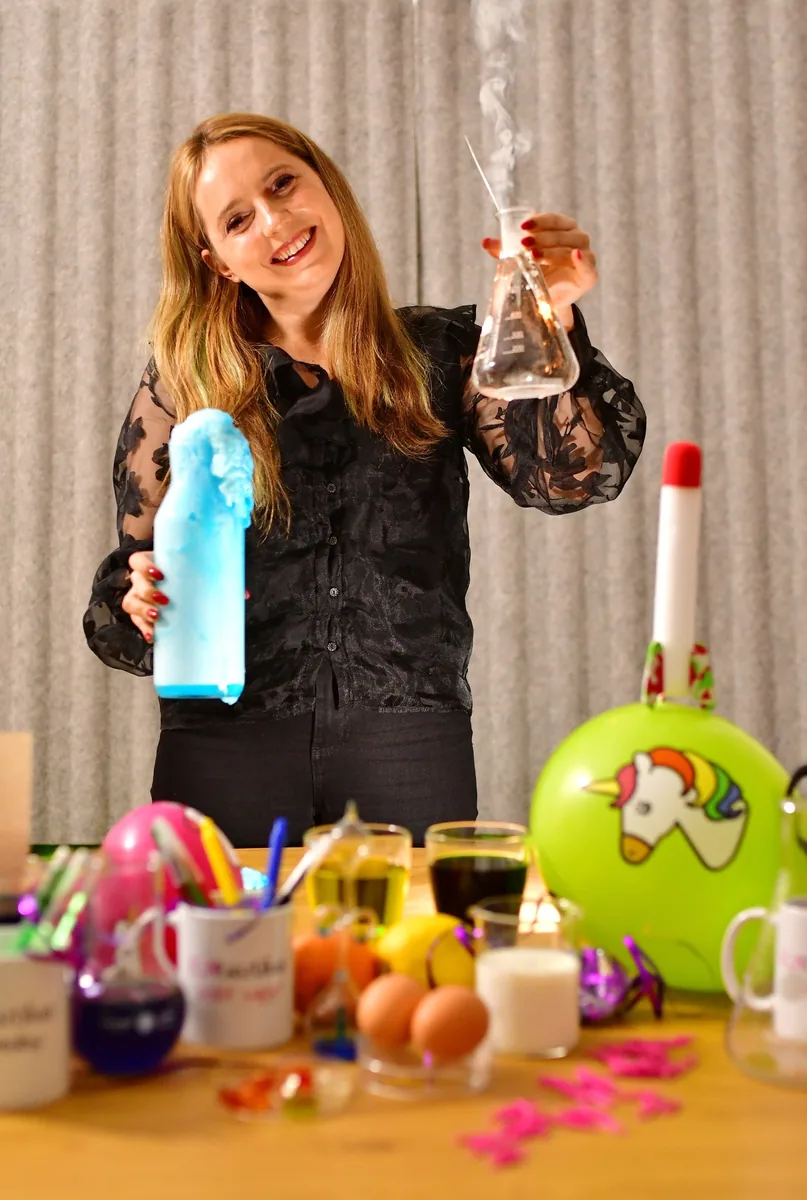
I’m Janka, a physicist from Hungary. For almost 15 years, I have run several hundred science shows for children and families, from big, smoky stage experiments to tiny kitchen ones.
I did every experiment in this booklet for real in my lab, and each one has its photo right next to it, so children can see what they are aiming for. Each one comes with a short story, because a story turns a glass of salt water into a mystery children want to solve.
How do you do an ice melting experiment with preschoolers?
Freeze colored ice cubes the day before. Then drop one into plain water and one into very salty water at the same time, and watch from the side. If your class guesses salt water, they are in good company: Tilda did too. In the glass, plain water wins.
You will need:
- Water
- Salt
- Ice cubes frozen with red or blue food coloring
- 2 identical clear glasses
- A spoon
- The day before, freeze water with a few drops of red or blue food coloring in an ice-cube tray.
- Fill both glasses with the same amount of room-temperature water.
- Stir salt into one glass until no more will dissolve. Wait 10 minutes so both glasses are back at room temperature.
- Drop the same number of matching ice cubes into both glasses at once.
- Watch from the side. Where does the ice melt faster, and which way does the colored meltwater go? When you’re done, pour the salt water away.
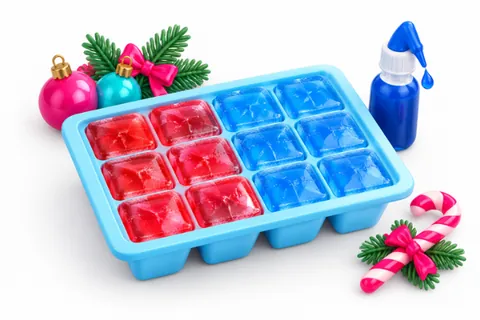
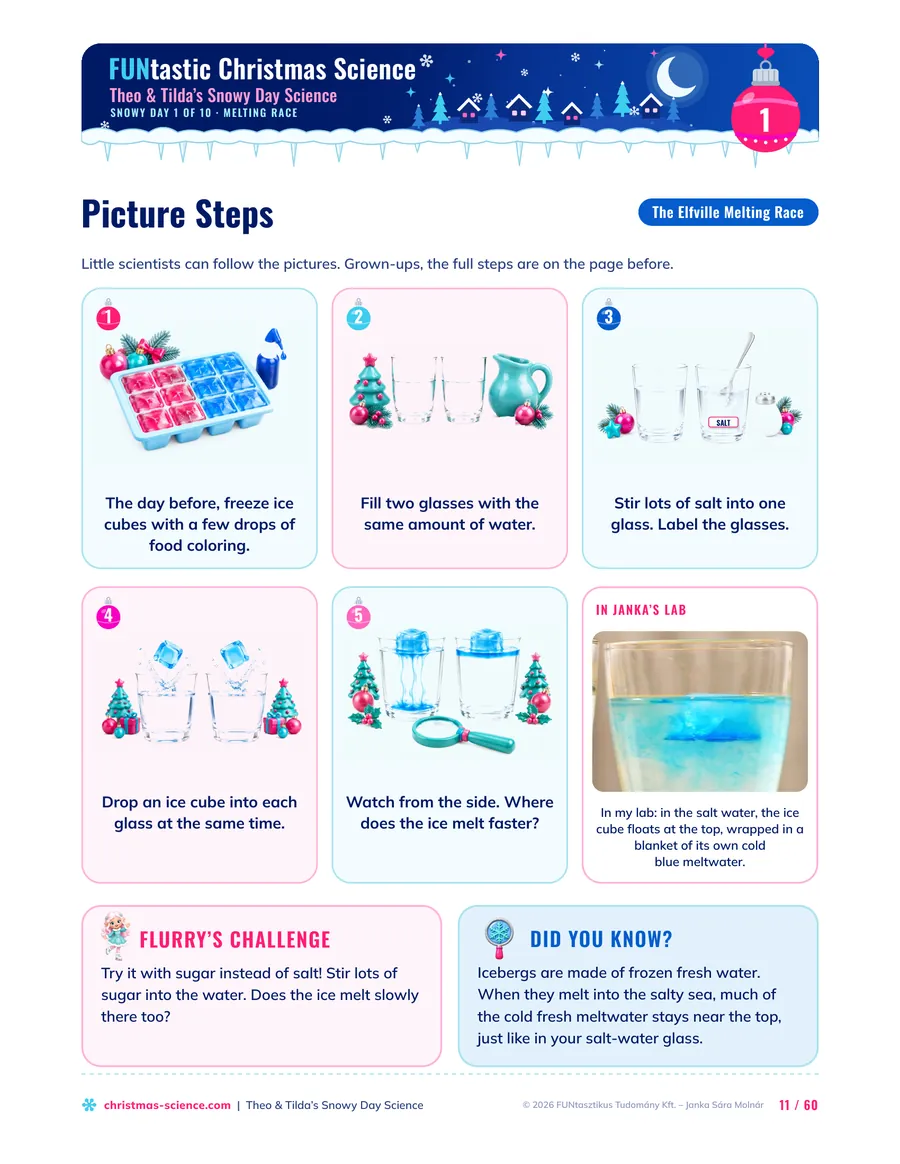
The day before, freeze ice cubes with a few drops of food coloring.
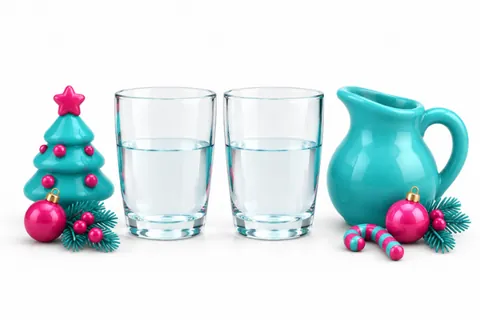
Fill two glasses with the same amount of water.
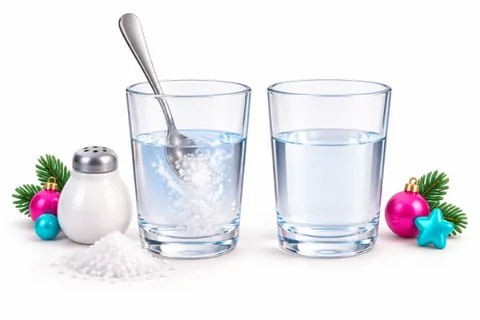
Stir lots of salt into one glass. Label the glasses.
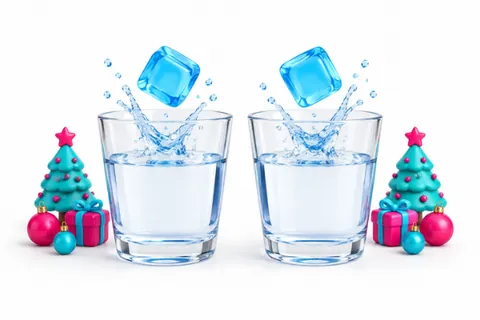
Drop an ice cube into each glass at the same time.
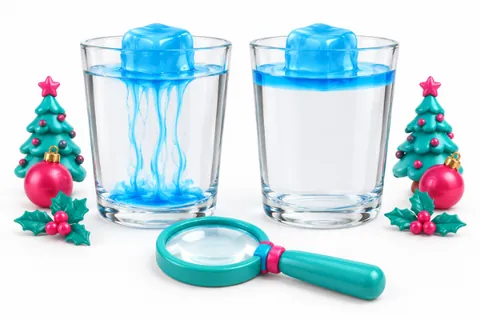
Watch from the side. Where does the ice melt faster?
The picture steps from Snowy Day 1. Little scientists follow the pictures. The full steps are on the page before.
A PHYSICIST’S TIP: WHY WAIT 10 MINUTES?
Stirring that much salt into water cools it a little. Start the race right away, and the salt glass starts colder, so the race isn’t fair. Same glasses, same amount of water, same ice cubes, same start: that’s a fair test, and little ones can check each “same” with you before you drop the ice.
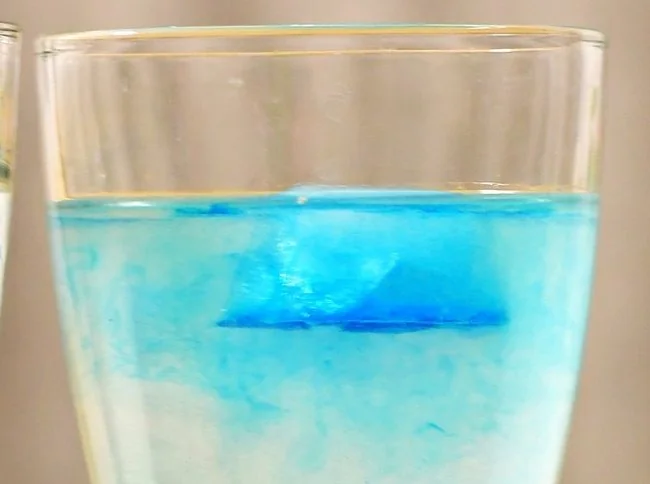 REAL PHOTO
What’s happening and why?
Melting ice makes cold fresh water. In plain water, that cold water is heavier for its size than the water around it, so it sinks, and warmer water flows in around the ice.
Salt water is much heavier for its size, so the cold meltwater stays on top and wraps the ice like a cold blanket. That’s why it melts more slowly.
Roads get salted for a different reason: salt that touches ice makes salty water, which freezes only below 32 °F (0 °C).
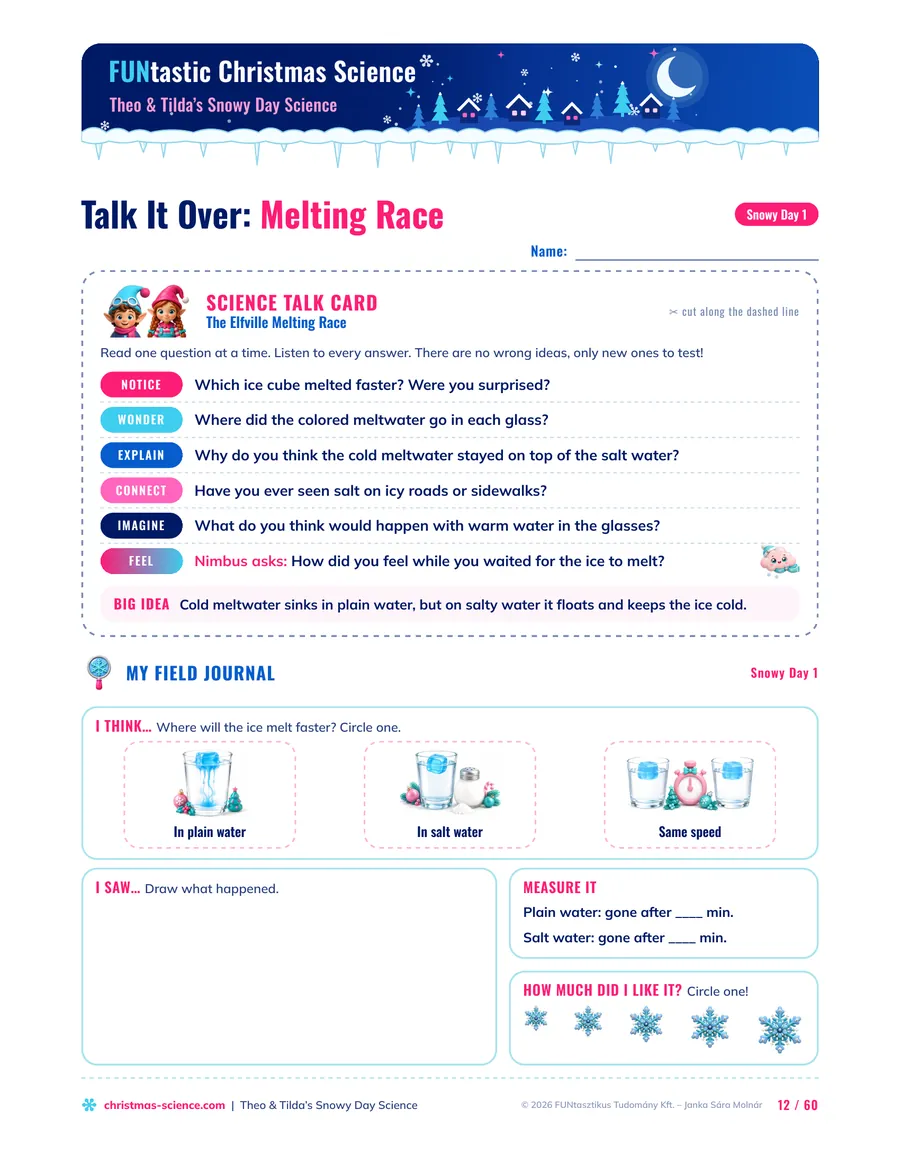
After the race: the six questions on the science talk card
Read one question at a time. Listen to every answer. There are no wrong ideas, only new ones to test!
Notice, wonder, explain, connect, imagine, feel: this question pattern works after any experiment. Save it, or share it with the teacher who runs your science corner. Share it
On the field journal page, each child circles a guess (plain water, salt water, or same speed), draws what happened, and writes down how many minutes each ice cube lasted. That’s predicting, observing, and measuring on one sheet, ready for each child’s portfolio.
Which snow science activities work without real snow?
Two of my favorites need only kitchen basics: Magic Snow from cornstarch and water, and Salt Snow Bubbles in a glass of oil and water. Both are hands-on, both look like snow, and both work in Texas as well as in Minnesota.
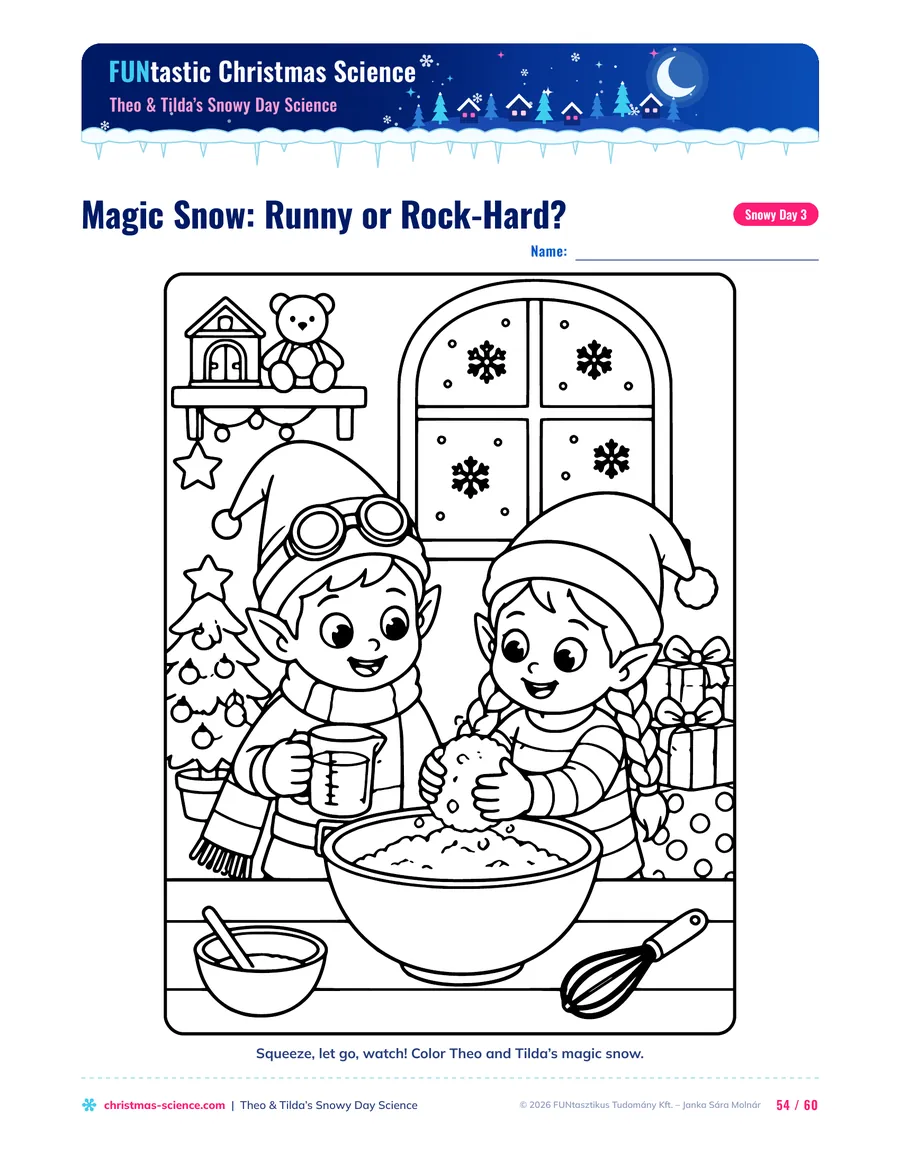
Magic Snow: runny or rock-hard?
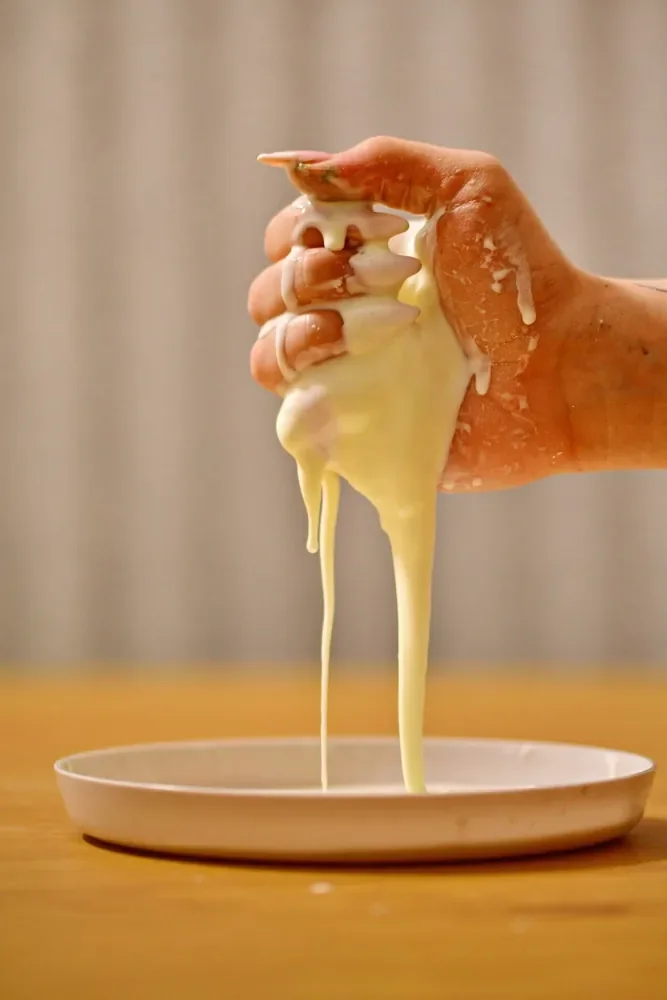 REAL PHOTO
The recipe: about 1 cup of cornstarch and ½ cup of water. Use about twice as much cornstarch as water by volume, for example 2 spoonfuls of cornstarch to 1 spoonful of water. Stir the water in a little at a time, with the bowl on a tray.
How to know it’s right: it flows slowly when you tilt the bowl, but feels hard when you tap it with the spoon. Too runny? Sprinkle in more cornstarch.
The play: grab a handful and squeeze it fast. It turns hard! Open your hand slowly, and the snow oozes away. Then push a finger in slowly, and poke it fast.
Cleanup: leftovers go in the trash, never down the drain. They can clog the pipes.
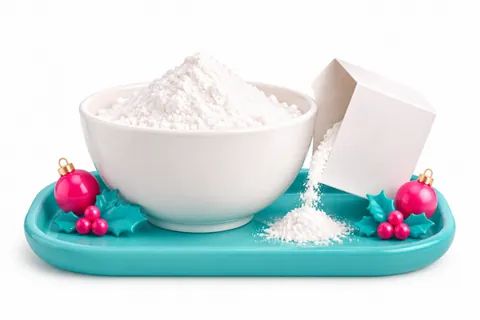
Set the bowl on a tray. Put the cornstarch in the bowl.
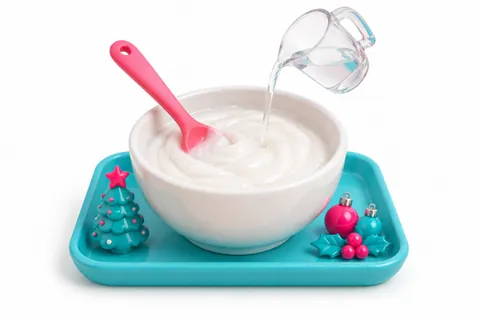
Stir in the water, a little at a time.
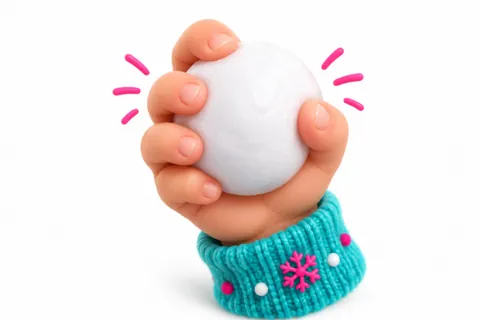
Grab a handful and squeeze it fast. It turns hard!
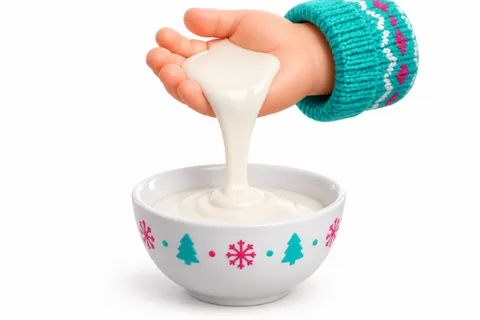
Open your hand slowly. The snow oozes away!
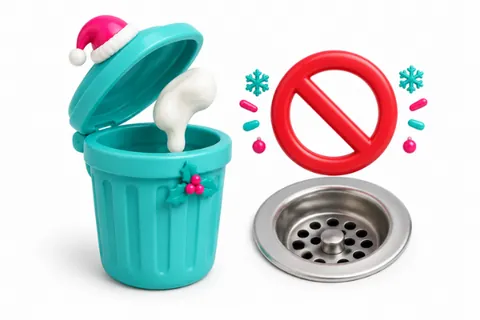
All done? Into the trash, never down the drain.
The picture steps from Snowy Day 3.
What’s happening and why?
Cornstarch doesn’t dissolve in water. Its tiny grains just spread out through it. Move slowly, and the water between the grains keeps them slippery, so the mix flows. Squeeze fast, and the grains get pressed together, the water can’t flow back between them in time, and they jam. The mix pushes back like a solid. The secret is speed.
Science words for the class: liquid, solid, and suspension (tiny grains spread through a liquid without dissolving).
Salt Snow Bubbles in a glass
- Pour a scant ½ cup (100 mL) of cooking oil into a tall clear glass.
- If you like, tint some water blue or turquoise. Pour it onto the oil, leaving a little room at the top.
- Wait a moment. Which layer floats on top?
- Sprinkle in a teaspoon of salt, like falling snow.
- Watch the salt sink, then see oil drops rise from the bottom, one by one. Add more salt to keep the show going.
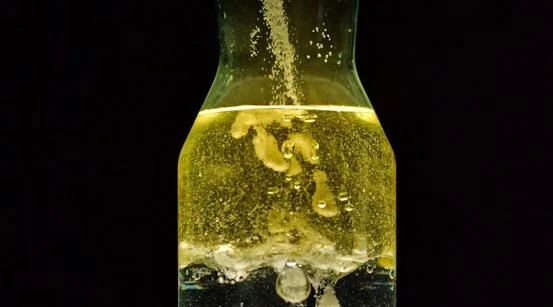 REAL PHOTO
FOR THE CLASSROOM: TWO JOBS, THEN SWITCH
One child sprinkles the salt, the other watches the bubbles. Then they switch. That’s the story value of Snowy Day 6, cooperation, built right into the experiment. For a bit of math, try Gus’s challenge: count the oil drops that rise in 1 minute, add another teaspoon of salt, and count again.
What’s happening and why?
Oil is less dense than water: the same amount weighs less, so it floats on top. As the salt grains pass through the oil, they drag some oil down with them. At the bottom, the salt slowly dissolves and lets go of the oil, which floats back up. So the rising “bubbles” are oil drops, not air bubbles.
Cleanup: pour the oil into an old jar and put it in the trash, not down the drain.
Which other winter science experiments can preschoolers do indoors?
Five more of my favorites need little more than salt, eggs, a balloon, paper clips, baking soda, vinegar, dish soap, and a pinch of turmeric: a floating egg, static snowflakes, a paper clip on water’s skin, a foam mountain, and a golden snowfall in a glass. In the booklet, they are Snowy Days 2, 4, 5, 7, and 10, each with its own story, picture steps, and talk card.
Floating Egg: can an egg learn to swim?
 REAL PHOTO
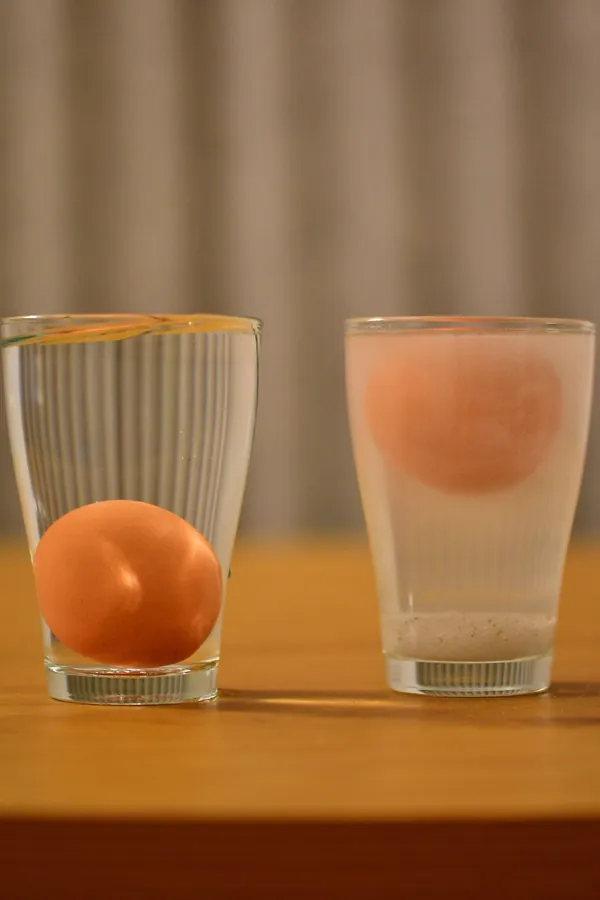
The setup: pour about 1 cup (250 mL) of lukewarm water into each of two glasses. Stir 3 tablespoons of salt into one until it dissolves, then gently lower a raw egg into each glass with a spoon.
What happens: in plain water, the egg sinks. In salty water, it rises and floats. Still on the bottom? Take the egg out, stir in 1–2 more tablespoons of salt, and try again.
Why: dissolved salt makes the water denser, so it pushes up harder. Once the salty water is denser than the egg, the egg floats.
For circle time: in the story, Theo wants to quit swim class because he always sinks. The egg that finally floats changes his mind. It’s a lovely one for children who are learning something hard.
Pour the same amount of water into two glasses.
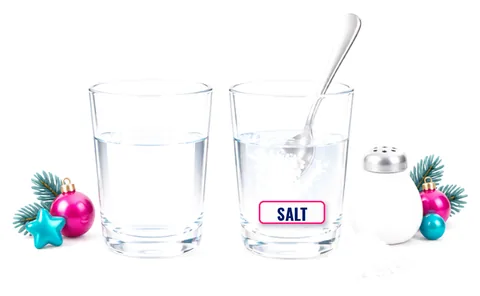
Stir lots of salt into one glass.
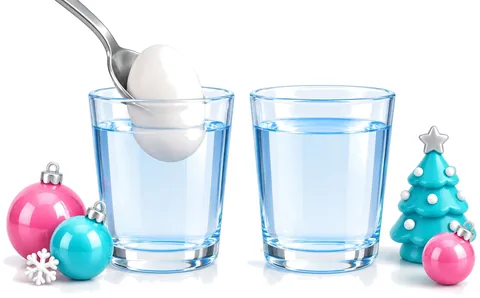
Lower an egg into each glass with a spoon.
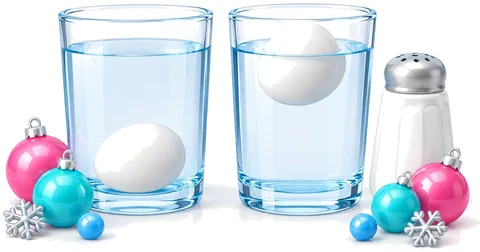
Plain water: the egg sinks. Salty water: it floats!
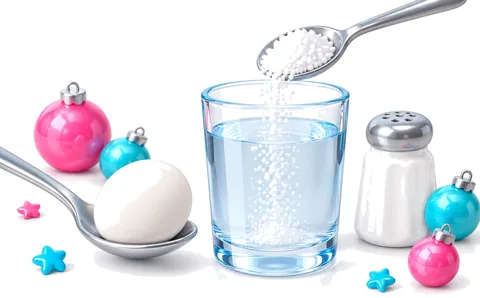
Still sinking? Take the egg out, stir in more salt, and try again.
The picture steps from Snowy Day 2. Wash hands after touching raw eggs, pour the salt water away, and put the eggs in the trash.
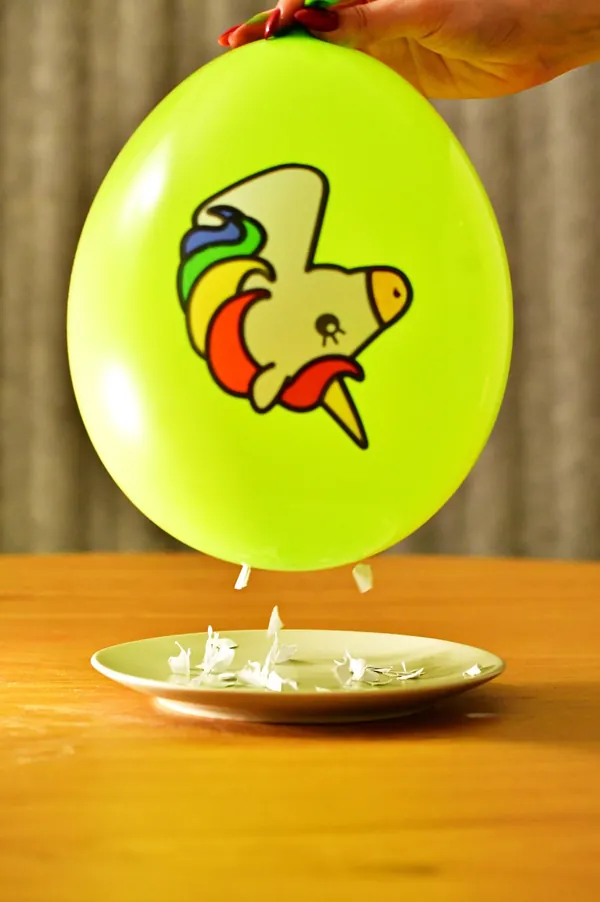
Static Balloon: paper snowflakes that jump
The setup: save the scraps from cutting paper snowflakes. A grown-up blows up a balloon. A child rubs it 10–20 times on a wool sweater or on their hair, then holds it about 1 inch (2–3 cm) above the scraps.
What happens: the scraps jump up and cling to the balloon, like a little snowstorm flying upward.
Why: rubbing moves tiny charged particles, called electrons, onto the balloon. The charged balloon pulls the light paper bits toward it. It isn’t a magnet: it’s static electricity, and it works best in dry winter air.
 REAL PHOTO
Balloon safety for a preschool room
- Uninflated or broken balloons are a choking hazard for children under 8. A grown-up blows up the balloon, and if it pops, picks up every piece right away.
- Check for latex allergies first. If anyone is allergic, skip the balloon and rub a plastic comb or ruler instead.
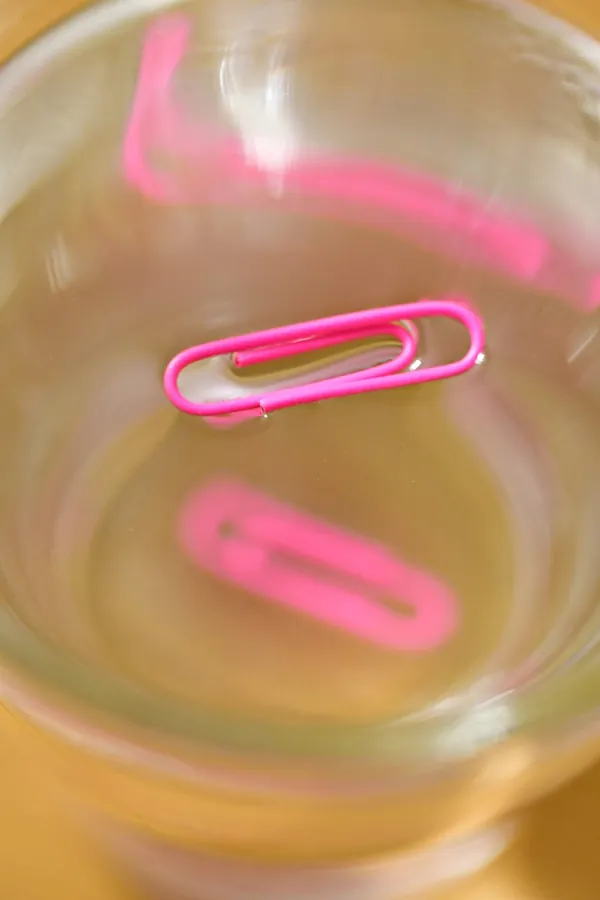
Water’s Skin: a paper clip that stays on top
 REAL PHOTO
The setup: drop one paper clip into a glass of water: it sinks right to the bottom. Lay a second, dry clip on a small piece of tissue and set both very gently on the water.
What happens: the tissue soaks through and sinks, but the clip stays on top, resting in a tiny dent. Then add one drop of dish soap at the edge of the glass, and down it goes.
Why: water pulls on itself, so its surface acts like a thin, stretchy skin. Scientists call it surface tension. Soap weakens the skin.
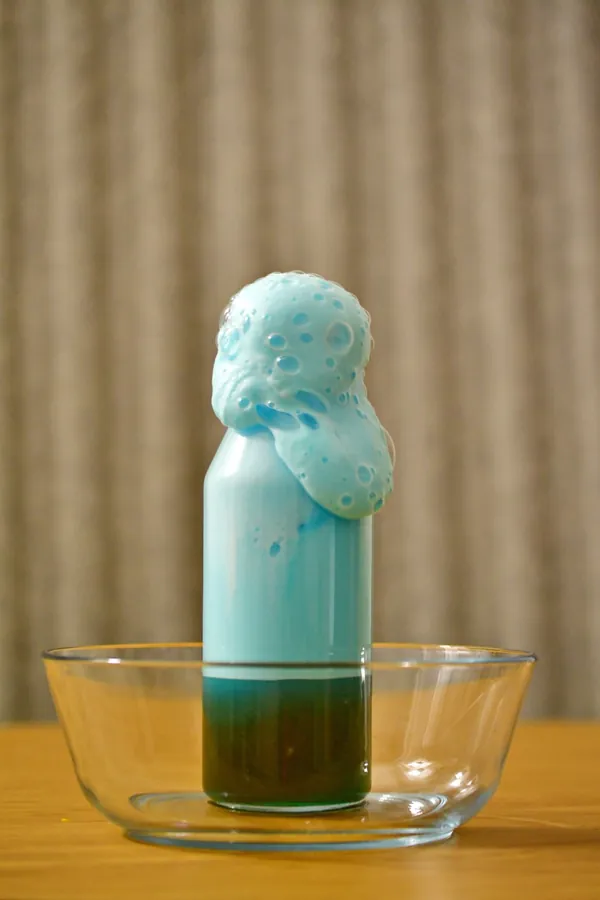
Foam Mountain: snow you can build in a bowl
The setup: put a bowl on a tray, and add 2–3 tablespoons of baking soda and a few drops of dish soap. With goggles on, pour in about ½ cup (120 mL) of vinegar all at once, and step back.
What happens: the foam grows and climbs out of the bowl like a little snowy mountain.
Why: baking soda and vinegar make carbon dioxide gas, and the dish soap traps it in bubbles. Fresh, fluffy snow is full of trapped air too, which makes a lovely comparison at circle time.
 REAL PHOTO
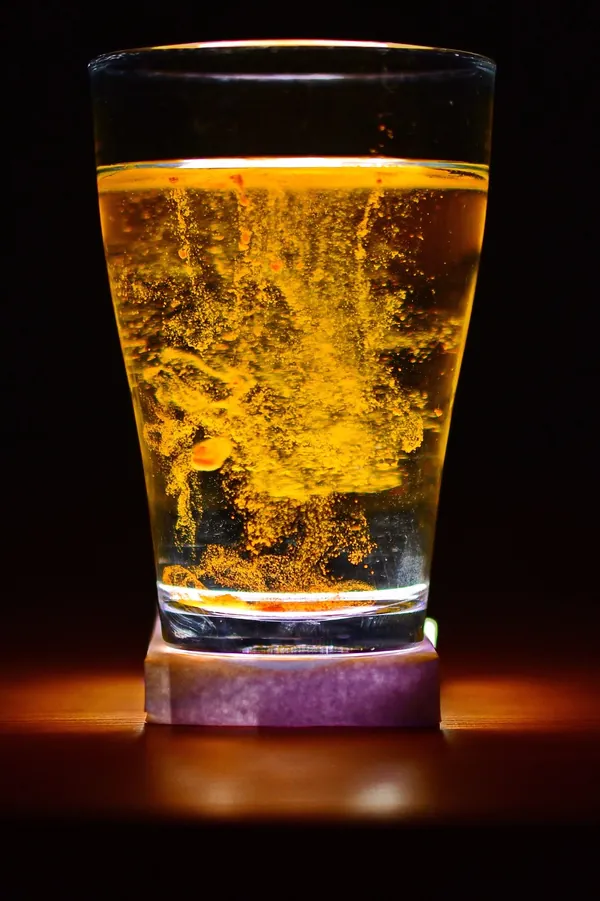
Golden Snowfall: a light show in a glass
 REAL PHOTO
The setup: turn on a phone’s flashlight, slip the phone into a clear zip-top bag, and lay it down so the light shines up. A grown-up sets a glass of water on the light so it stands steady.
What happens: darken the room and sprinkle in a pinch of turmeric. Golden specks swirl and sparkle in the beam, like snow falling under a streetlight.
Why: in clear water, the beam is almost invisible. The tiny turmeric specks send light toward your eyes, so you see the beam glow gold. Careful: turmeric stains yellow.
How do I teach winter science at circle time?
Read the story first, let children vote on what will happen, then do the experiment as a demonstration or in small groups with a grown-up at each table. Finish with the talk card. Each Snowy Day adventure is four pages long, built for exactly that order.
- 1The story (160 words or fewer): Theo, Tilda, and their snowy friends face a real-life problem and a big feeling. Story words, the story’s treasure, and talk questions are on the same page.
- 2The experiment: everyday materials, clear steps, a real photo from my lab, and the science in kid-friendly words.
- 3Picture steps: little ones follow the pictures. Then a challenge from Flurry, Gus, or Nimbus, and a “Did you know?” fact.
- 4Talk and record: the science talk card, a field journal page, and a mini mission for the week.
My four tips for a snowy science day
In the classroom, print a field journal page for every child and keep the pages in a snow science folder. By the end of your snowy days, every child has ten pages of their own science to take home.
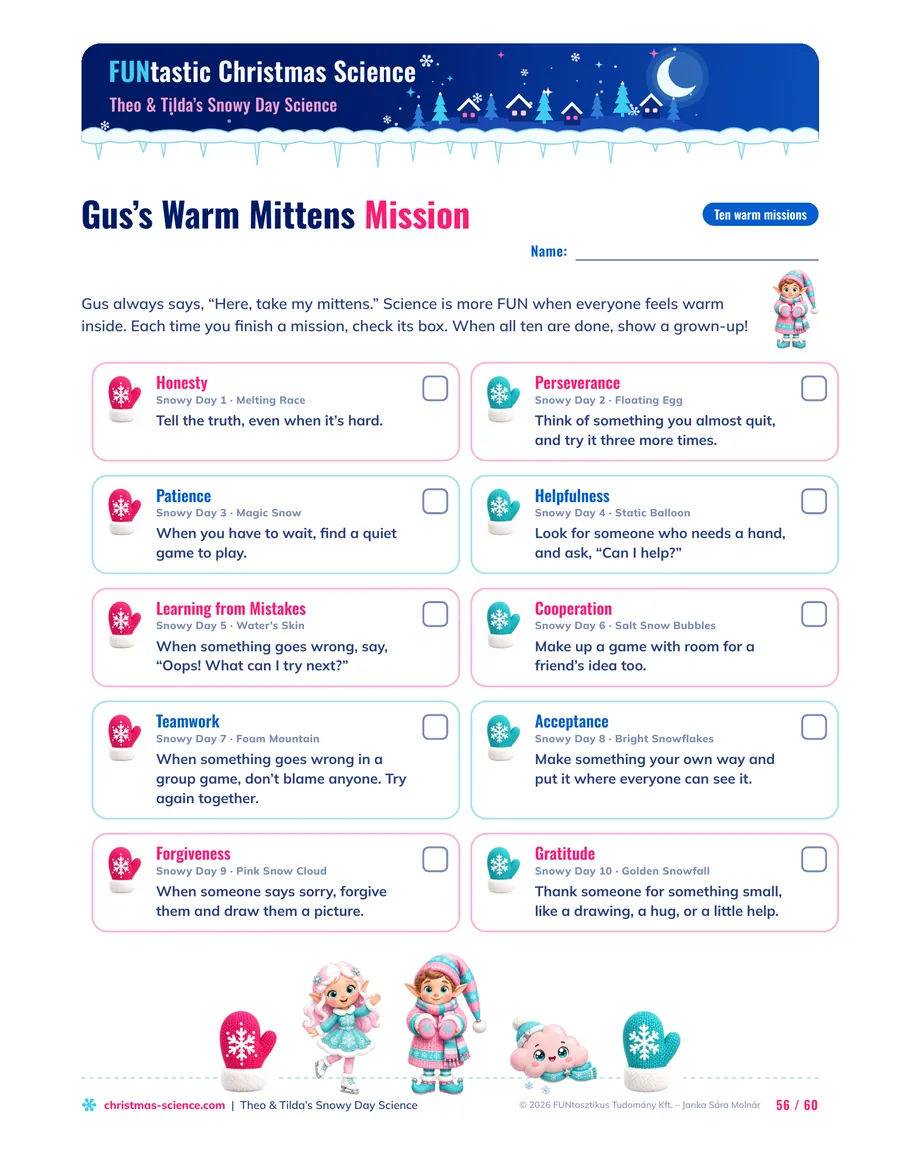
Ten days of kindness: Gus’s Warm Mittens Mission
Gus always says, “Here, take my mittens.” Each story has a value, and each value has a small mission. Children check off a mitten when they have done it:
The grown-up steps, clearly marked
Four of the ten days have a grown-up-only part: blowing up the balloon on Snowy Day 4, handling the rubbing alcohol on Snowy Day 8, cracking the egg and separating the yolk on Snowy Day 9, and setting the glass of water on the light on Snowy Day 10. The pages mark each one with an “Adult needed” label. Here are the picture steps for Snowy Day 9, the Pink Snow Cloud:
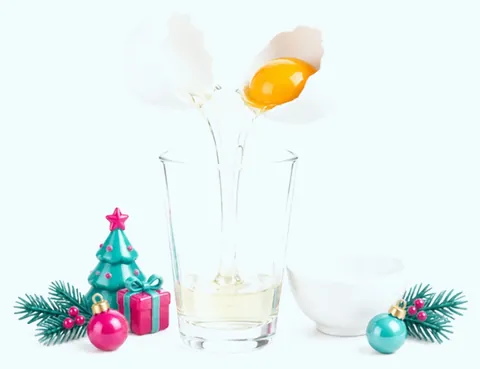
With a grown-up’s help, put the egg white in a tall glass.
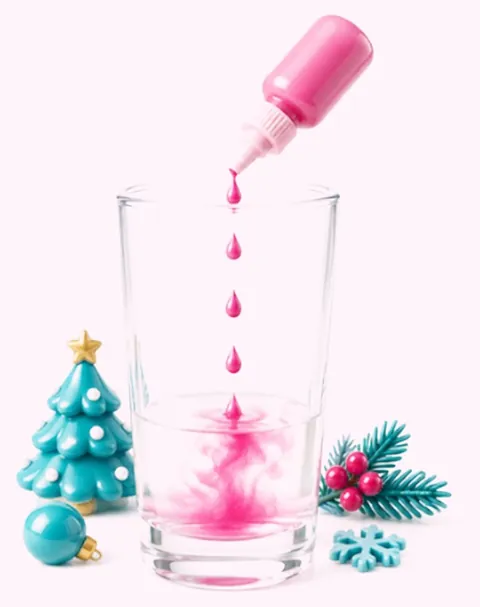
Add a few drops of food coloring.
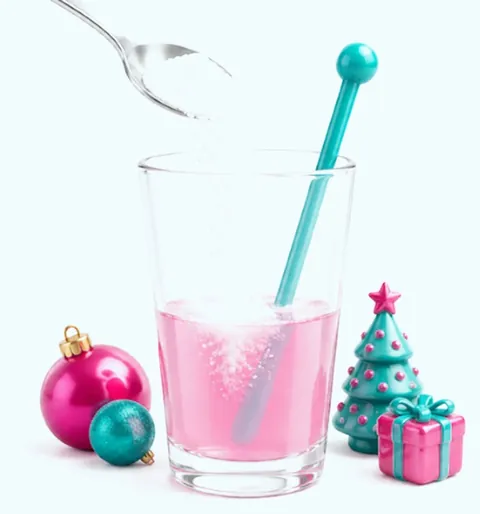
Sprinkle in the baking soda and stir.
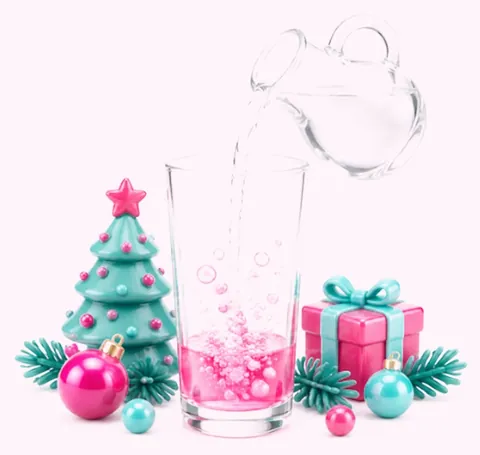
Goggles on! Pour in the vinegar!
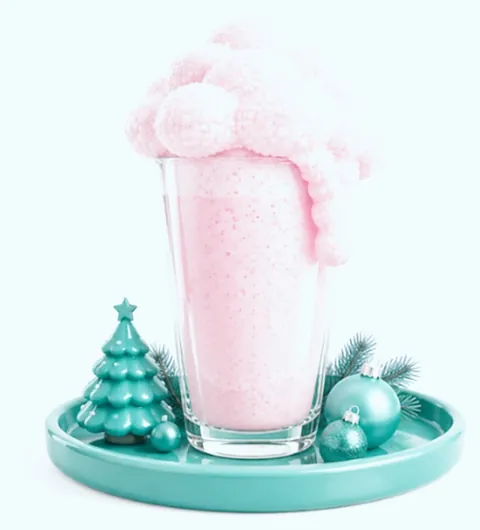
Watch the foam cloud rise over the top!
Nimbus’s challenge: measure your cloud with a ruler, then again after 5 minutes. Did it shrink?
Safety notes for a preschool room
- Every experiment is done with a grown-up. For children under 5, use clear plastic cups instead of glasses, wipe up spills at once, and keep everything away from mouths.
- Not for children under 3: paper clips, bottle caps, marker lids, and balloon pieces are choking hazards.
- Nothing from an experiment is food. Don’t taste or sniff the salty water, the magic snow, the rubbing alcohol, the foam, the pepper, or the turmeric. Pour very salty water away right after use, and wash hands afterward.
- Snowy Day 4: a grown-up blows up the balloon. Uninflated or broken balloons are a choking hazard for children under 8, so pick up every piece of a popped balloon right away. If anyone has a latex allergy, use a plastic comb or ruler instead of the balloon.
- Snowy Days 7, 8, and 9: goggles on for everyone, and work on a tray.
- Snowy Day 8: only a grown-up pours and drips the rubbing alcohol while the children watch, and the bottle stays out of their reach. It catches fire easily, so keep it away from candles, flames, and heaters, and open a window.
- Snowy Days 2 and 9: raw egg. On Day 9, a grown-up cracks the egg and separates the yolk. Everyone washes hands afterward, and children with an egg allergy should not touch raw egg.
- Snowy Day 10: seal the phone in a clear bag, and a grown-up sets the glass on the light so it stands steady.
Send these safety notes to your aide or co-teacher before snowy science day, so every grown-up knows the grown-up steps. Share it
What else can preschoolers do in a winter science week?
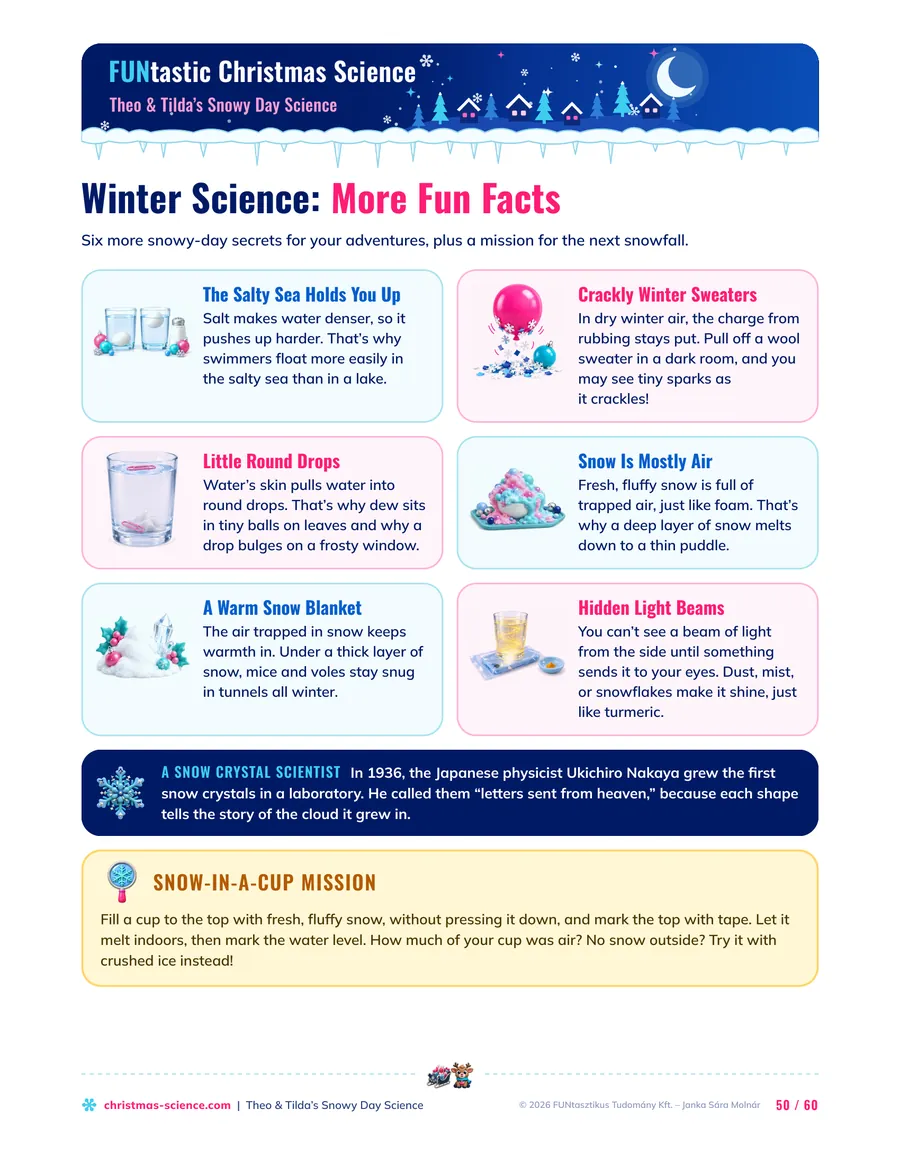
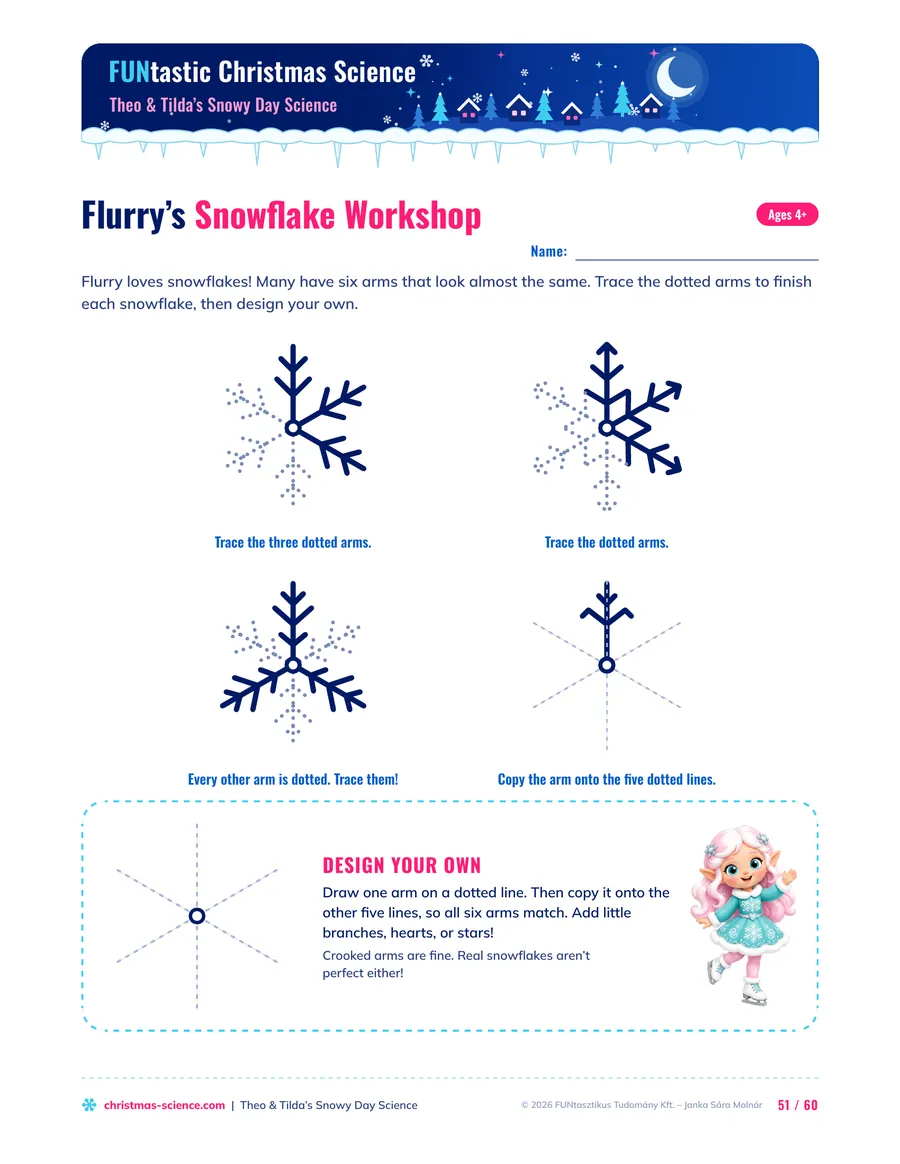
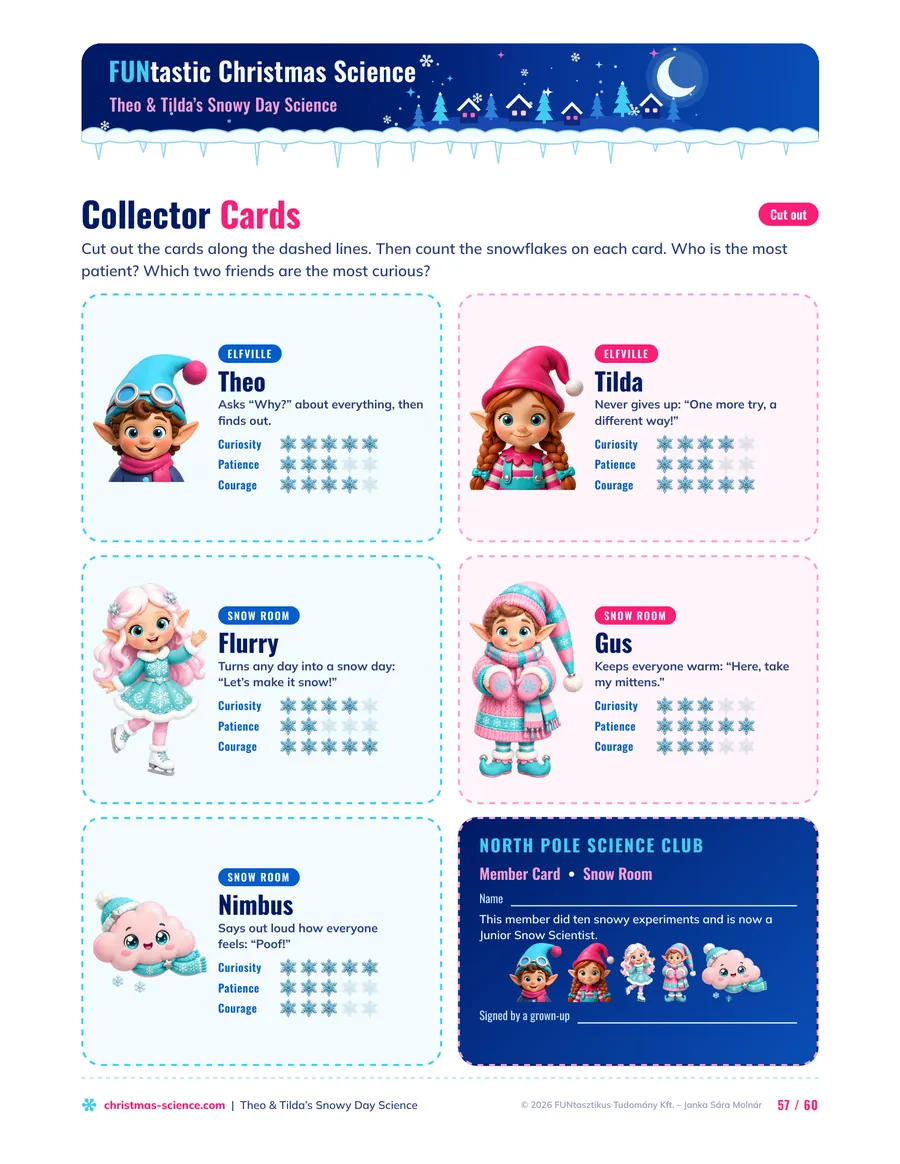
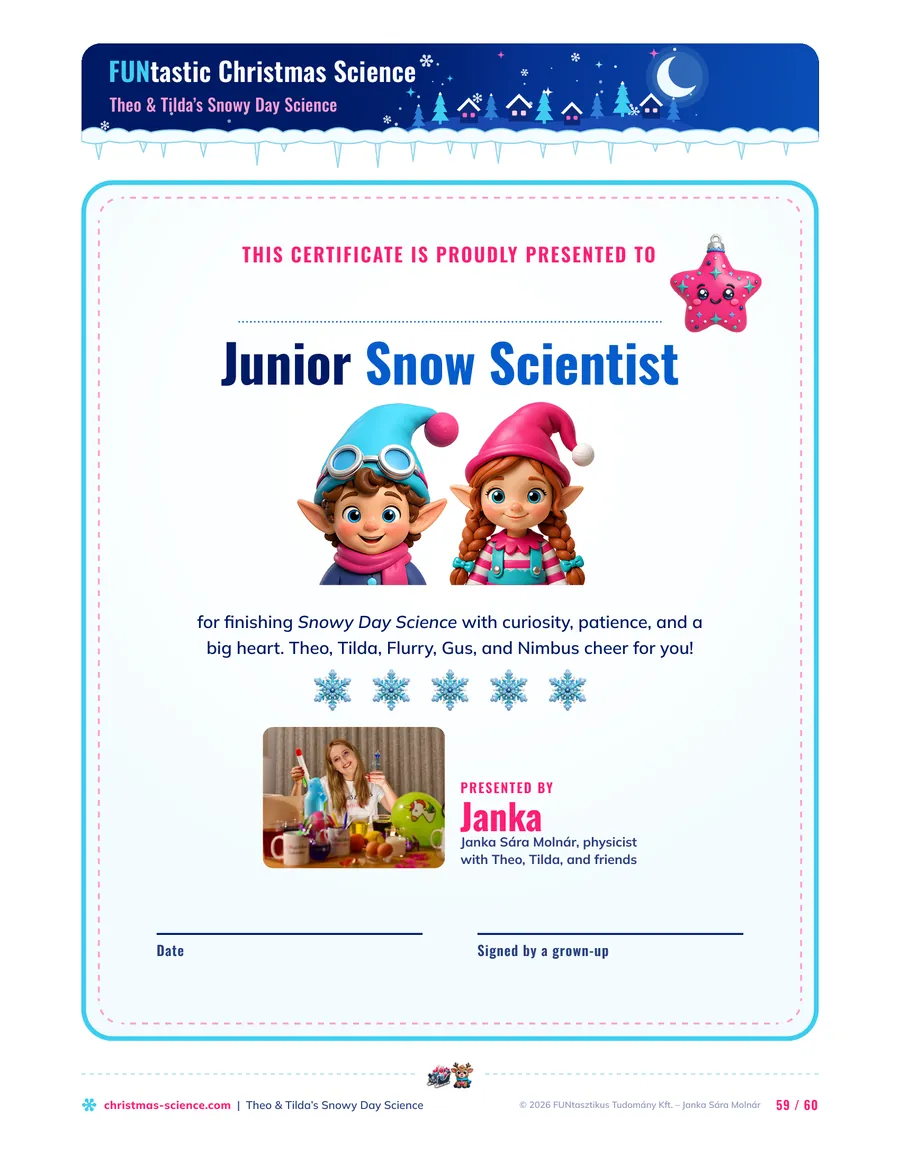
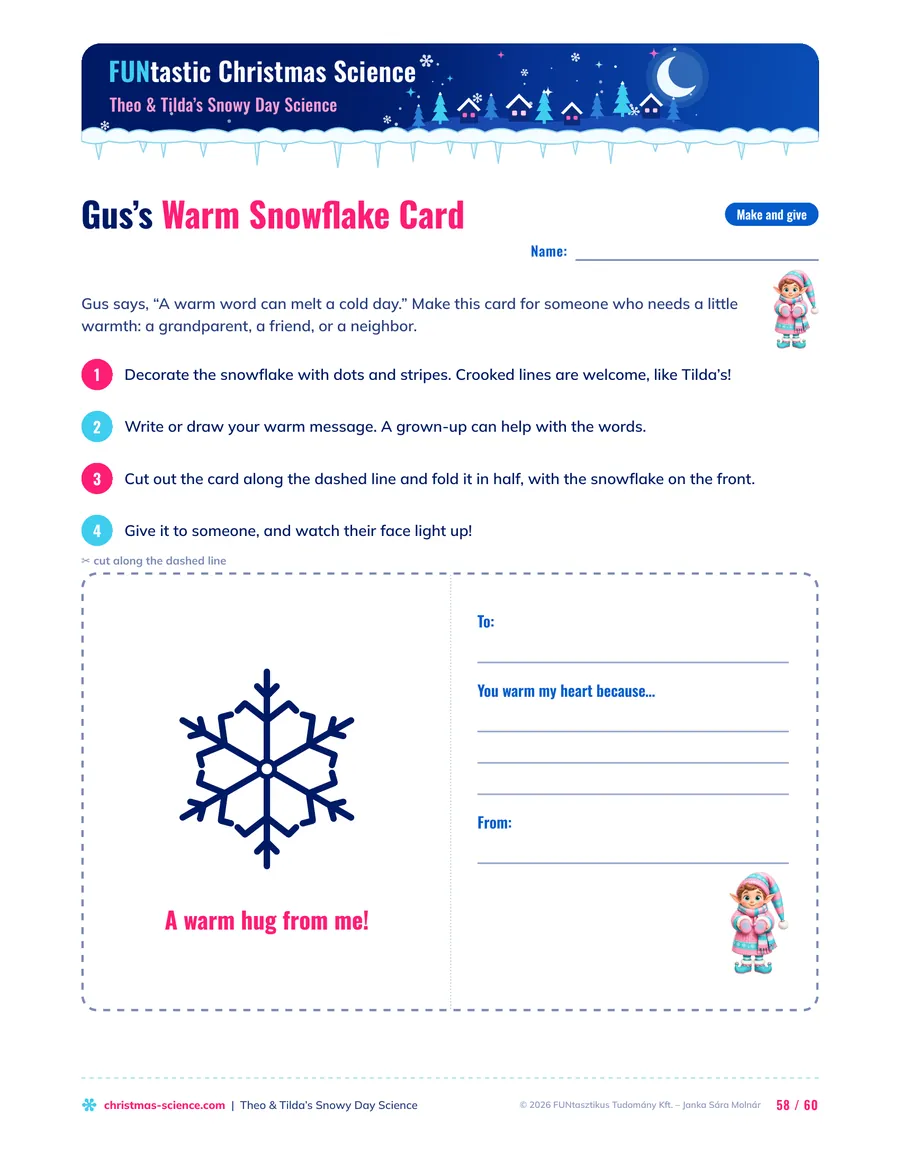
Add a snowflake, a quiz, and a certificate. The last pages of Snowy Day Science are made for that: two pages of snow and winter facts, a snowflake workshop, a two-part true-or-false quiz, collector cards, a card to give away, and a Junior Snow Scientist certificate.
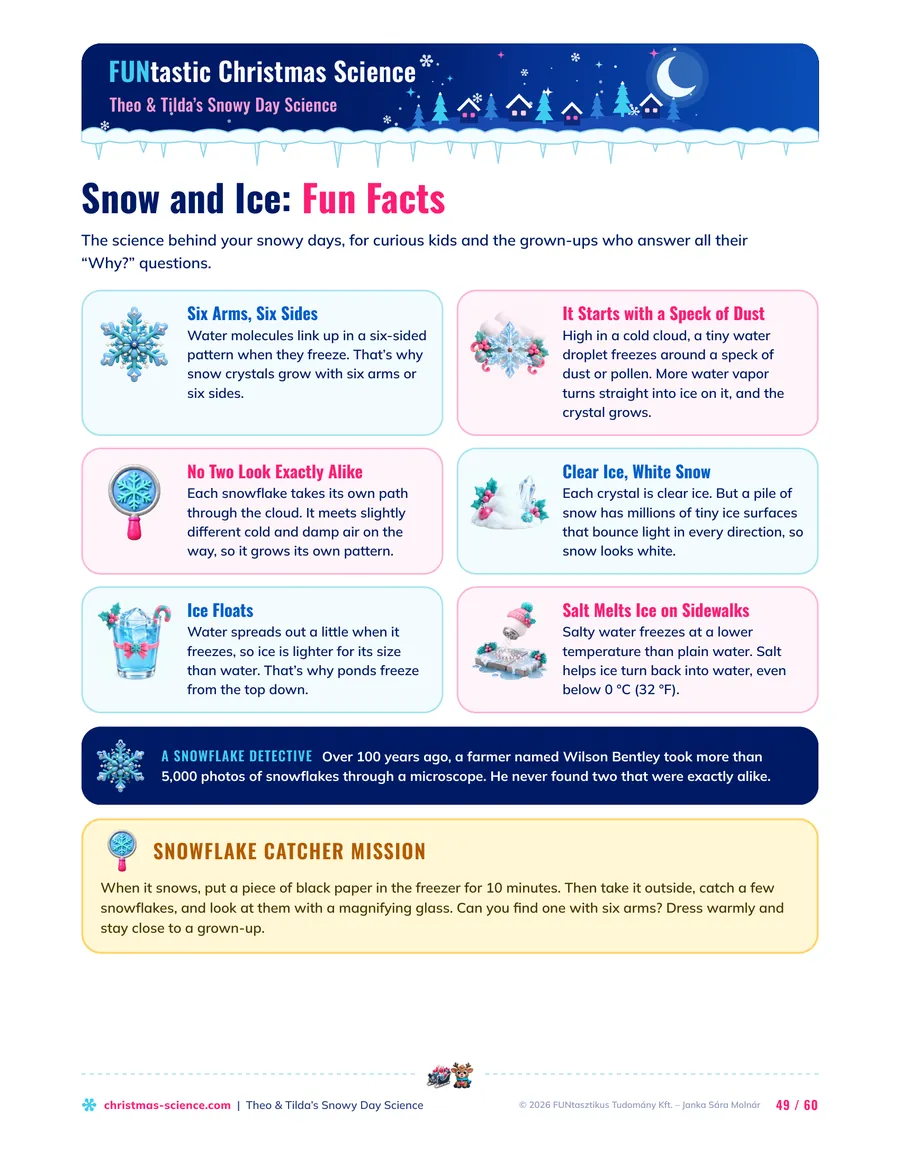
Snow and ice facts for curious kids
And one true story for circle time: over 100 years ago, a farmer named Wilson Bentley took more than 5,000 photos of snowflakes through a microscope. He never found two that were exactly alike.
ON A REAL SNOW DAY: SNOWFLAKE CATCHER MISSION
Put a piece of black paper in the freezer for 10 minutes. Take it outside, catch a few snowflakes, and look at them with a magnifying glass. Can you find one with six arms? Dress warmly and stay close to a grown-up.
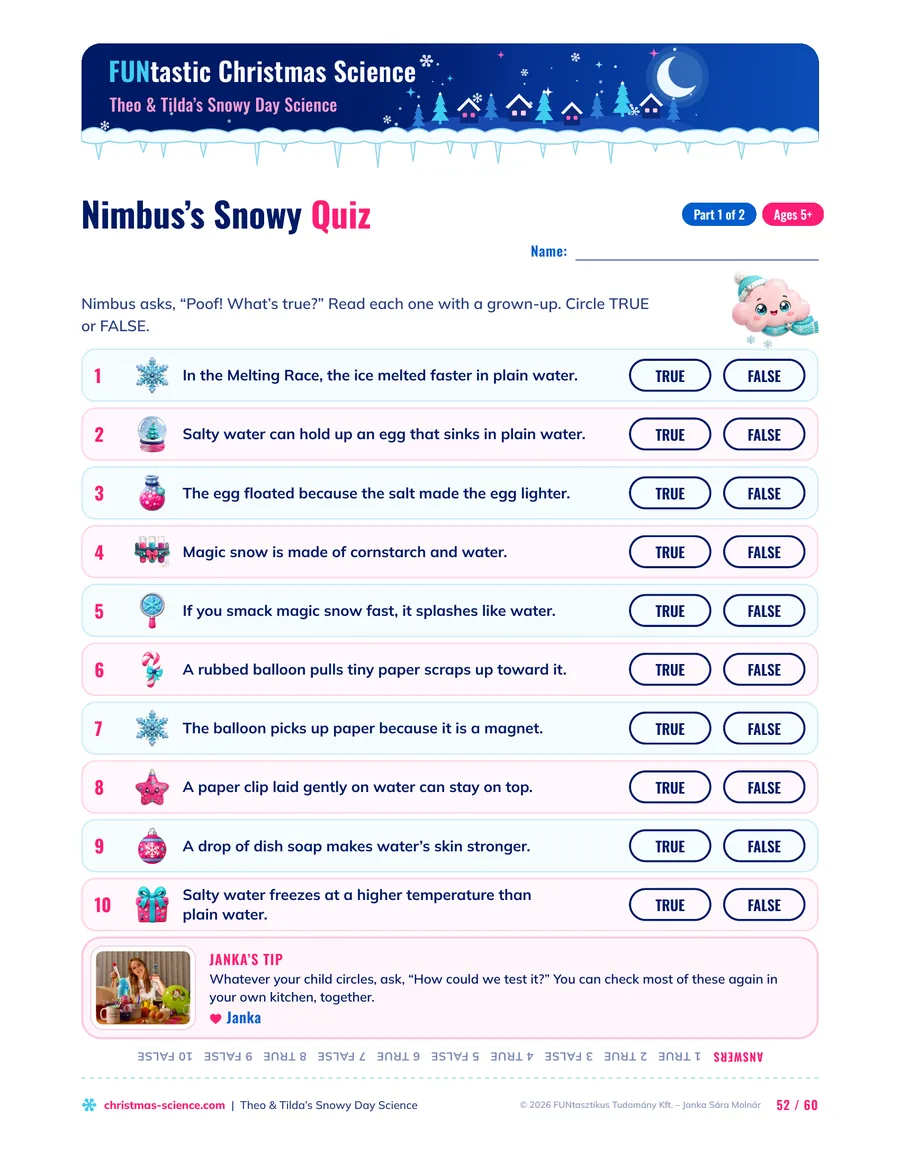
Nimbus’s Snowy Quiz (ages 5+)
Twenty true-or-false sentences in two parts, one for each half of your snowy days. A few of them:
My tip from the quiz page: whatever a child circles, ask, “How could we test it?” You can check most of these again, together.
Want more than ten snowy days?
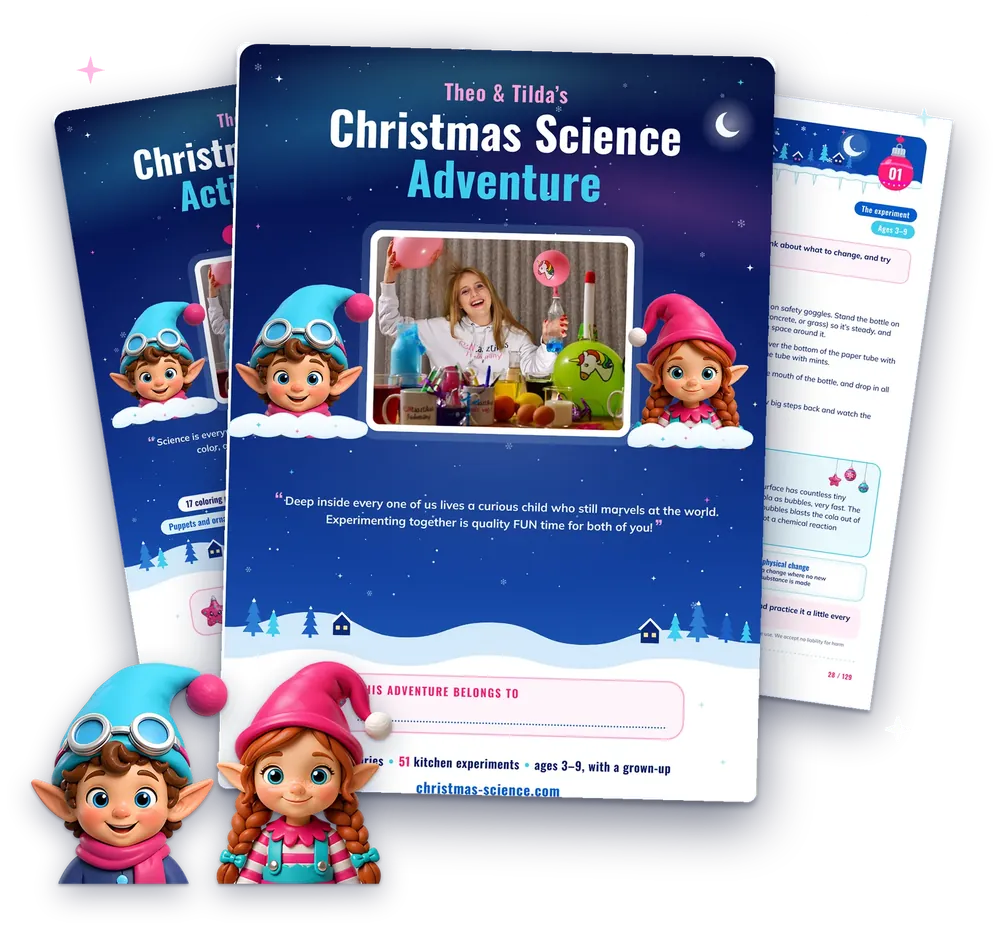
Theo and Tilda have 41 more adventures waiting. Theo & Tilda’s Christmas Science Adventure is a 129-page book with 51 read-aloud stories, 51 kitchen experiments with real photos, and a 24-day December plan. These ten experiments are in it too, with their own stories. For your class, the free curriculum links and teacher guides for the USA, the UK, Australia, and New Zealand are on the Christmas Science website.
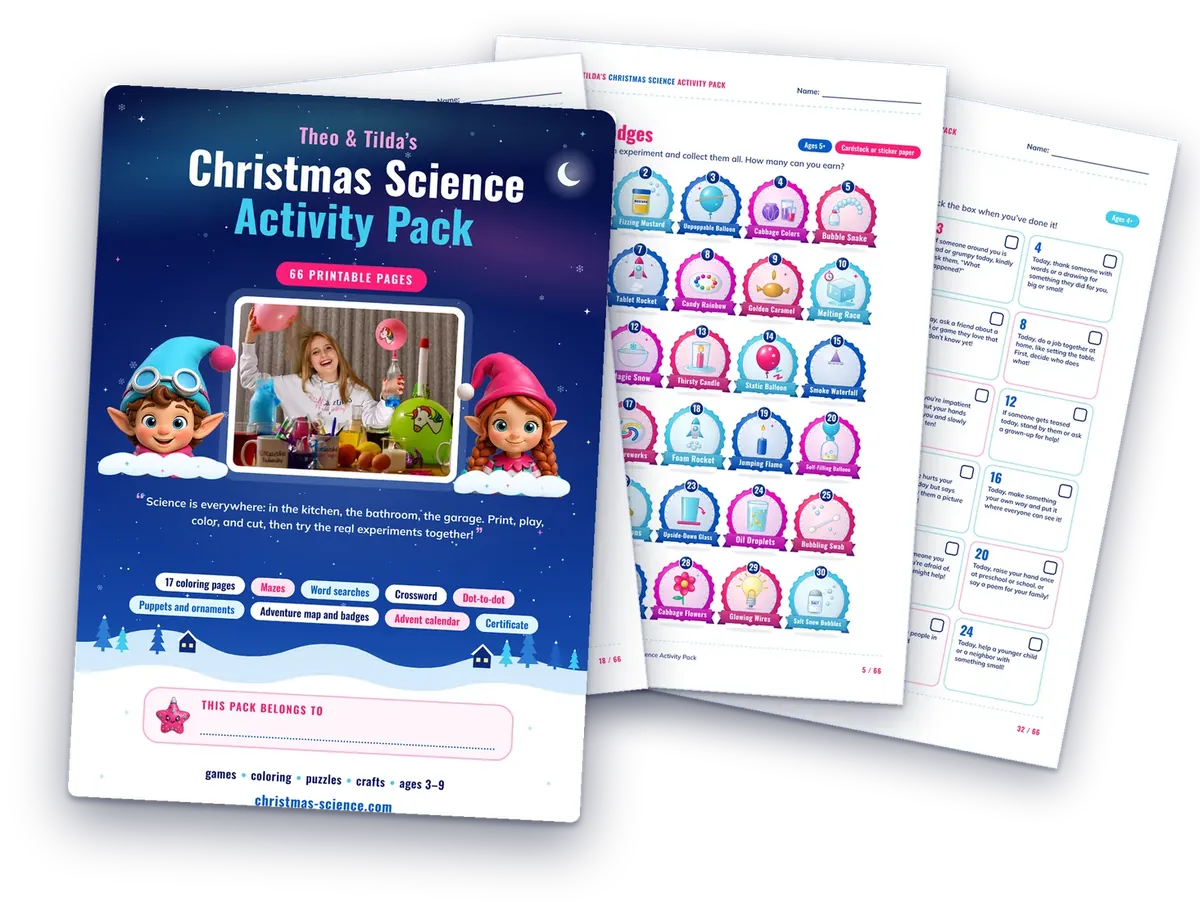
The Book + Activity Pack bundle adds 68 pages for centers and quiet time: coloring pages, stick puppets, mazes, word searches, spot-the-difference pages, a crossword, dot-to-dots, an experiment journal, STEM challenge cards, Elf Lab Mysteries detective cases, and a certificate.
$13.99 launch price until December 24, then $17.99
Who won the Elfville Melting Race?
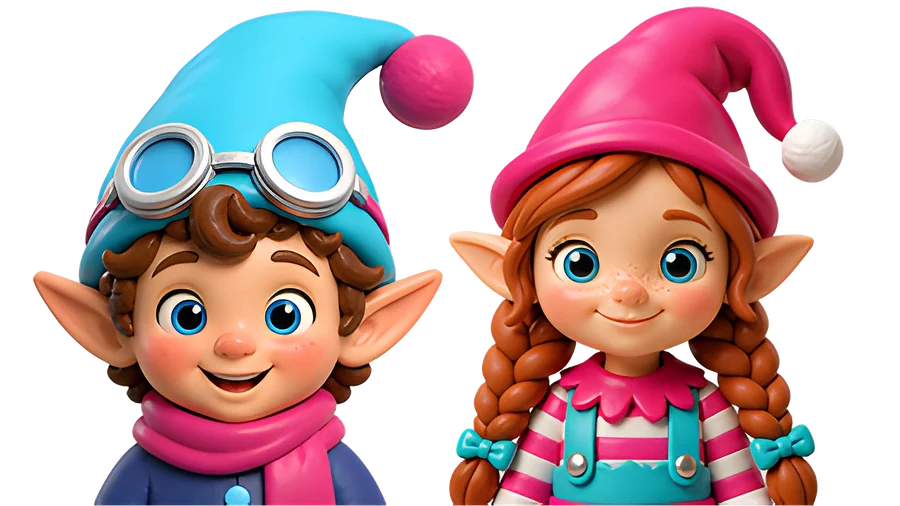
Gus sat down beside Theo. “You look worried,” he said. Nimbus drooped and turned gray. “Poof… someone feels guilty.”
Theo took a deep breath. “Tilda, I already knew the answer. It wasn’t a real bet.” Tilda turned away, hurt. Then Flurry clapped. “Forget the race. Let’s solve the mystery together!”
In plain water, colored streaks swirled down. In salt water, the ice melted much more slowly. “Let’s put up the star together,” said Theo. Tilda shook his hand, and Nimbus turned pink again.
Ask your class: Why did Theo admit he already knew the answer, when he could easily have won? And the mini mission for the week: if you’re tempted to hide something, tell the truth instead, and notice how much lighter your heart feels!
Know a teacher who’d love this?
If the Melting Race made you curious, send it to a teacher friend. The ice melting experiment and the six talk card questions above are free to try with any class.
COPY THIS MESSAGE
Paste it into your staff group chat, or send it to a colleague.
I found ten winter science experiments for preschoolers that need no real snow! An ice melting race, a floating egg, magic snow, static snowflakes, a golden snowfall, and more, each with a little story for circle time and the science explained by a physicist. www.christmas-science.com/blog/winter-science-experiments-for-preschoolers
Questions teachers ask
Do winter science experiments for preschoolers need real snow?
No. All ten experiments in Snowy Day Science use kitchen and classroom basics: ice cubes, salt, cornstarch, cooking oil, eggs, a balloon, paper clips, baking soda, vinegar, and a pinch of turmeric, so they work in any classroom, with or without snow outside. On a real snow day, the Snowflake Catcher Mission and the Snow-in-a-Cup Mission take the science outdoors.
What age are these winter science experiments for?
Snowy Day Science is for ages 3–9, so it fits preschool, pre-K, and kindergarten. The snowflake tracing page is for ages 4 and up, and the true-or-false quiz is for ages 5 and up. It is not for children under 3, because of small parts like paper clips, bottle caps, marker lids, and balloon pieces.
Are these experiments safe for a preschool classroom?
Yes, with a grown-up at every step. The ten experiments in Snowy Day Science use no flames and no hot water. For children under 5, use clear plastic cups instead of glasses. A grown-up blows up the balloon on Snowy Day 4 (uninflated or broken balloons are a choking hazard under 8, and a plastic comb or ruler replaces the balloon if anyone has a latex allergy), handles the rubbing alcohol on Snowy Day 8, cracks the egg on Snowy Day 9, and sets the glass on the light on Snowy Day 10. Everyone wears goggles on Snowy Days 7, 8, and 9. Children with an egg allergy should not touch raw egg, salty water is poured away after use, and nothing from an experiment is food.
Can I print the pages for my whole class?
Yes. One purchase covers one teacher with their own group or class, and you can print the field journal and activity pages as many times as your class needs. Please don’t share or upload the file. You get the booklet in US Letter and in A4.
Which winter science experiments work best for preschoolers?
The ones children can predict, see, and touch: an ice melting race in plain and salty water, an egg that floats in salt water, cornstarch magic snow, a static balloon that makes paper snowflakes jump, a paper clip resting on water’s skin, salt snow bubbles in oil, a foam mountain, bright marker snowflakes, a pink foam snow cloud, and a golden snowfall of turmeric in a glass lit from below.
What is in Snowy Day Science, and how much does it cost?
Theo & Tilda’s Snowy Day Science is a 60-page printable booklet for ages 3–9, in US Letter and A4, for $3.99. It has 10 read-aloud stories with Theo, Tilda, Flurry, Gus, and Nimbus, 10 experiments with real photos from Janka’s lab, picture steps, science talk cards, a field journal, two fun facts pages, a snowflake workshop, a two-part quiz, coloring pages, collector cards, a kindness mission, and a certificate.
About Janka
Janka Sára Molnár is a physicist and award-winning science communicator from Hungary, and the founder of FUNtastic Christmas Science. As a high school student, she built particle detectors and took them to CERN several times, where she presented them in its teacher program. She graduated from Eötvös Loránd University (ELTE) in Budapest, and for almost 15 years she has run several hundred science shows for children and families.
- FORBES NEXT: 30 talented young people under 30 from the world of science – 2018
- Rising Star Award, Creator Awards, 2024
- Role Model Award, Innovation, Nők Lapja, 2026
- Juhari Zsuzsanna Blog of the Year Award, Hungarian Academy of Sciences, 2023
All experiments are designed to be done with grown-up supervision. The illustrations of Theo, Tilda, and their world were created with AI-assisted tools (Canva) and edited by our team. Physicist Janka Sára Molnár wrote the stories and the experiment instructions herself, and she designed and tested every experiment. AI tools were used only to correct and polish the text. The experiment photos are real photos of her own experiments.
Keep reading
More Christmas science ideas from Theo, Tilda, and me.
 Free calendar · Preschool · 9 min readScreen-Free Preschool Advent Calendar (Free Printable)A free, screen-free preschool advent calendar from a physicist: 24 ten-minute science wonders and kindness missions for Pre-K and K. Free to share.Read the post →
 For parents · 22 min read10 Kitchen Science Experiments for Kids, Physicist-Tested10 easy kitchen science experiments for kids 3–9: lava lamp, walking water, bouncy egg, melting ice race, and more. Exact amounts, real photos.Read the post →
 For parents · 19 min readFizzy Science Experiments for Kids: 12 Christmas Ideas12 fizzy science experiments for kids 3–9, tested by a physicist: a bouncy egg, a self-inflating balloon, a lava lamp, a cola geyser, and more.Read the post →
© 2026 FUNtasztikus Tudomány Kft. – Janka Sára Molnár