Kitchen Science Experiments for Kids: 10 Easy Liquid Experiments with Household Items
Honey, salt, oil, vinegar, a gummy bear, and a few candies. Exact amounts, real results from my lab, and what to do when it doesn’t work.
Save it for a cozy weekend, or send it to a parent friend.
The best kitchen science experiments for kids use things you mostly have already: honey, milk, oil, dish soap, salt, vinegar, eggs, and water, plus gummy bears, candies, food coloring, paper towels, and a fizzy vitamin C tablet. Ten easy ones for ages 3 to 9 are a liquid tower, a floating egg, color drops in oil, a giant gummy bear, a homemade lava lamp, salt snow bubbles, an ice melting race, a candy rainbow, walking water, and a bouncy egg. Together they show children how liquids sink, float, refuse to mix, and climb up paper, how water moves into a gummy bear overnight, and how vinegar dissolves an eggshell.
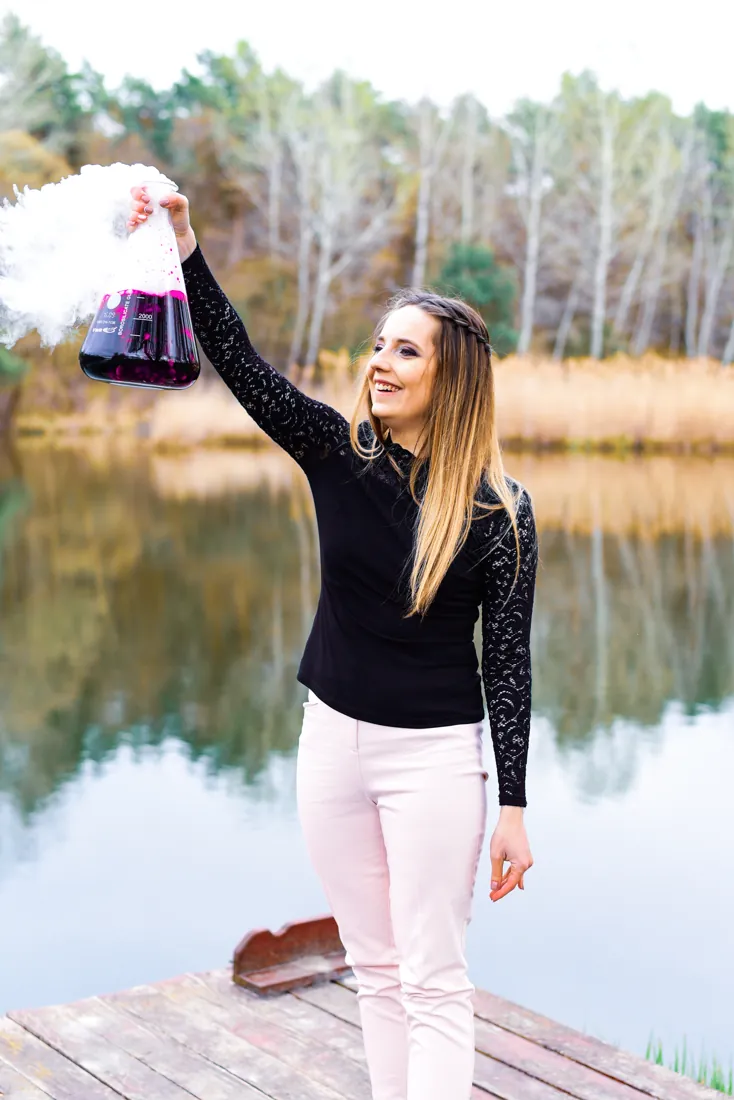
Janka here! 👋 I’m a physicist, and for almost 15 years I have run science shows for children and families in Hungary, from big, smoky stage experiments to tiny kitchen ones. These ten experiments come from my new Christmas booklet, Theo & Tilda’s Kitchen Liquids Lab. I did every one of them in my lab, and the result photos in this post are mine. Below you’ll find the exact amounts, the small tricks that make each one work, and what to say when your child asks, “Why?”
Know a parent who has run out of ideas for indoor afternoons? Send this to them. Almost everything here is already in the kitchen. Share it
What are the best kitchen science experiments for kids at home?
Start with liquids. They are cheap, and most of them are already in your kitchen. Pour honey, dish soap, milk, and oil into one glass slowly, one at a time, and they stack up instead of mixing. Here are the ten Lab Days of the Kitchen Liquids Lab, with what you need, the science idea, and the story’s treasure for each.
| Lab Day | Experiment | You need | Science idea | Story treasure |
|---|---|---|---|---|
| 1 | Liquid Tower | 2 tbsp each of honey, dish soap, milk, and oil | density | Learning from mistakes |
| 2 | Floating Egg | 2 fresh raw eggs, table salt, water | buoyant force | Perseverance |
| 3 | Color Drops in Oil | oil, liquid food coloring, a clear plastic sleeve | surface tension | Cooperation |
| 4 | Giant Gummy Bear | 2 matching gelatin gummy bears, cold water | osmosis | Patience |
| 5 | Lava Lamp | oil, water, food coloring, a plain fizzy vitamin C tablet, safety goggles | carbon dioxide and density | Empathy |
| 6 | Salt Snow Bubbles | a tall glass, oil, water, 1–2 tsp salt | density | Cooperation |
| 7 | Melting Race | 2 glasses, salt, colored ice cubes | density and meltwater | Honesty |
| 8 | Candy Rainbow | about 30 small candies with colored shells, a white plate, water | diffusion | Acceptance |
| 9 | Walking Water | 4 glasses, food coloring, paper towels | capillary action | Generosity |
| 10 | Bouncy Egg | a raw egg, white vinegar, a glass, safety goggles | acids and osmosis | Patience |
My four tips for every Lab Day
- Ask “What do you think will happen?” before every experiment. Guess first, then watch, then explain. That is how real scientists work.
- Let small hands do the pouring and dripping. Slow is better than fast!
- Read the story first. Its treasure, like patience or empathy, makes the experiment mean more.
- Work on a tray, keep a towel nearby, and wear old clothes. Oil and honey love to drip, and food coloring stains!
Do one adventure a day, or two on a cozy weekend. Just plan a few things ahead: start the gummy bear in the evening, freeze colored ice cubes the day before the melting race, start the walking water in the morning, and put the egg in vinegar 2–3 days before you bounce it. Each Lab Day has four pages: a read-aloud story, the experiment, picture steps your child can follow, and a science talk card with a field journal page.
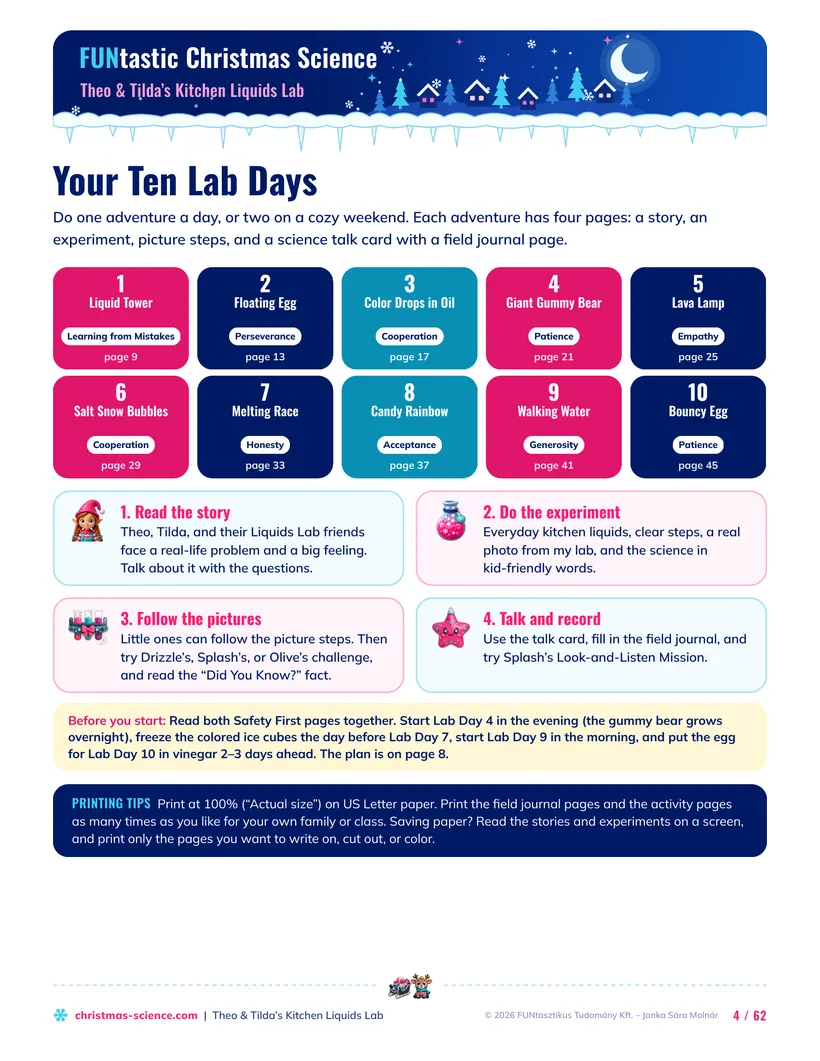
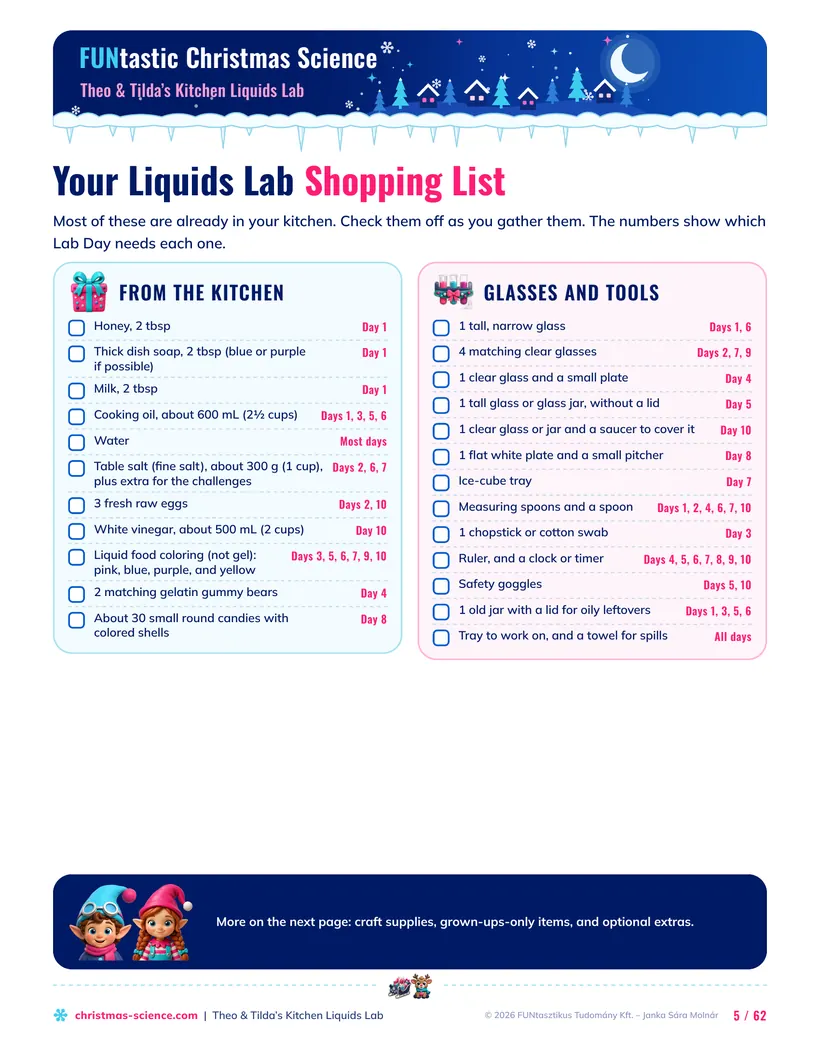
What else is inside the booklet?
After the ten Lab Days come the games and activities: a cut-and-glue tower builder, a float-or-sink board game, a 20-question true-or-false quiz, two fun facts pages, collector cards, two coloring pages, a science dictionary, ten kindness missions, a gift to make, and a Junior Liquids Scientist certificate. The whole booklet is 62 pages. Tap any page to see it bigger.
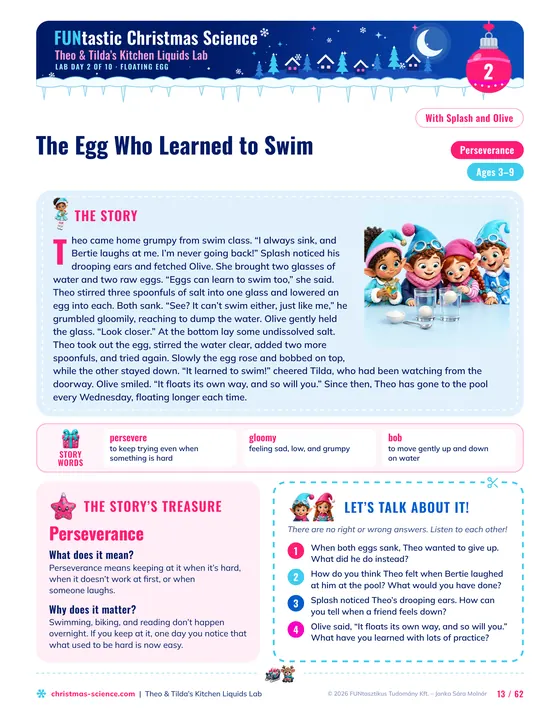
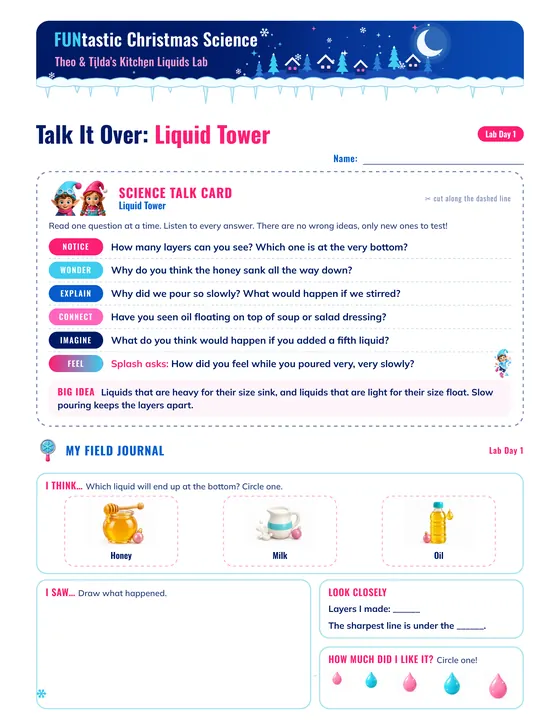
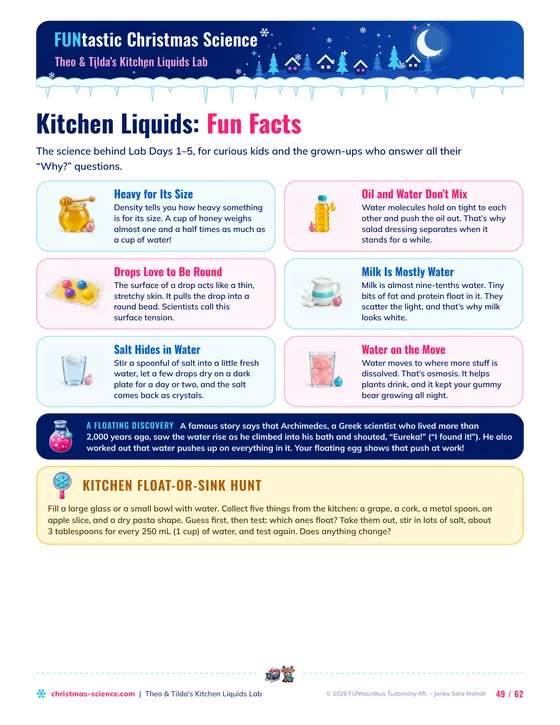
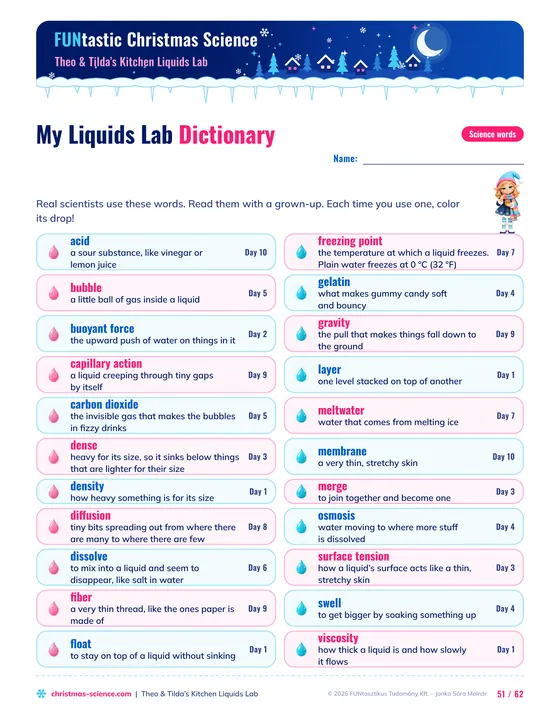
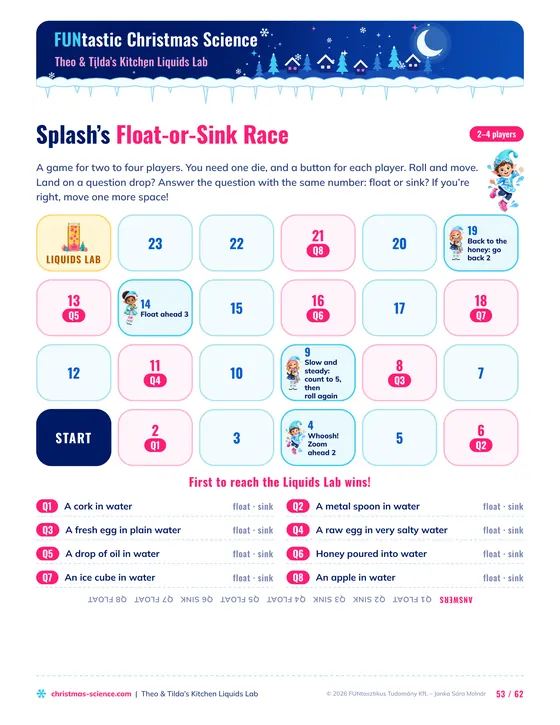
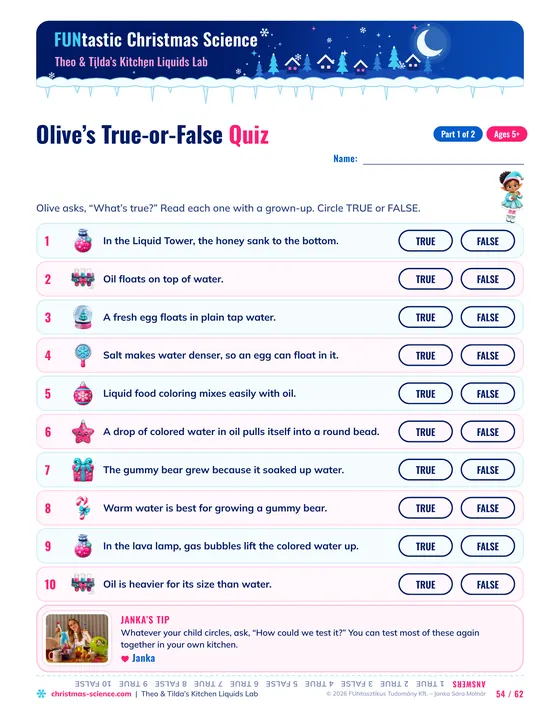
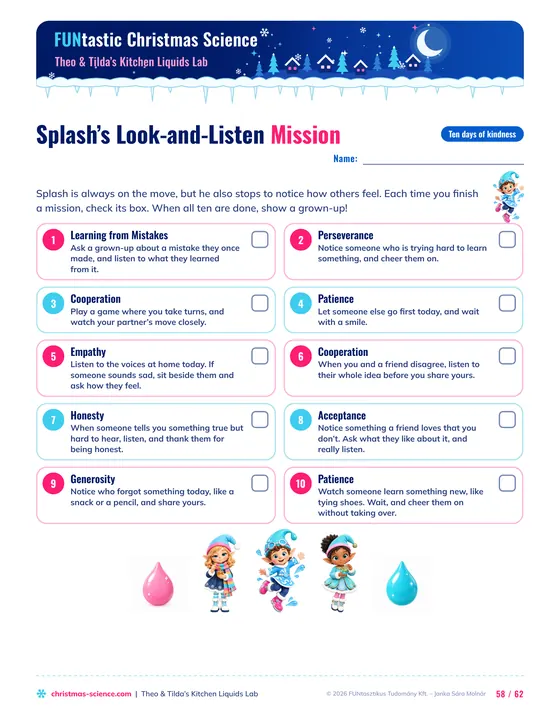
Already have the big book, Theo & Tilda’s Christmas Science Adventure? There, these ten are experiments 8, 10, 11, 24, 27, 30, 41, 42, 45, and 48. In the booklet, their stories are retold with Drizzle, Splash, and Olive, and you also get the picture steps, talk cards, field journal, games, and collector cards.
62 pages · 10 experiments · $3.99 · US Letter and A4
How do you make a liquid density tower with kids?
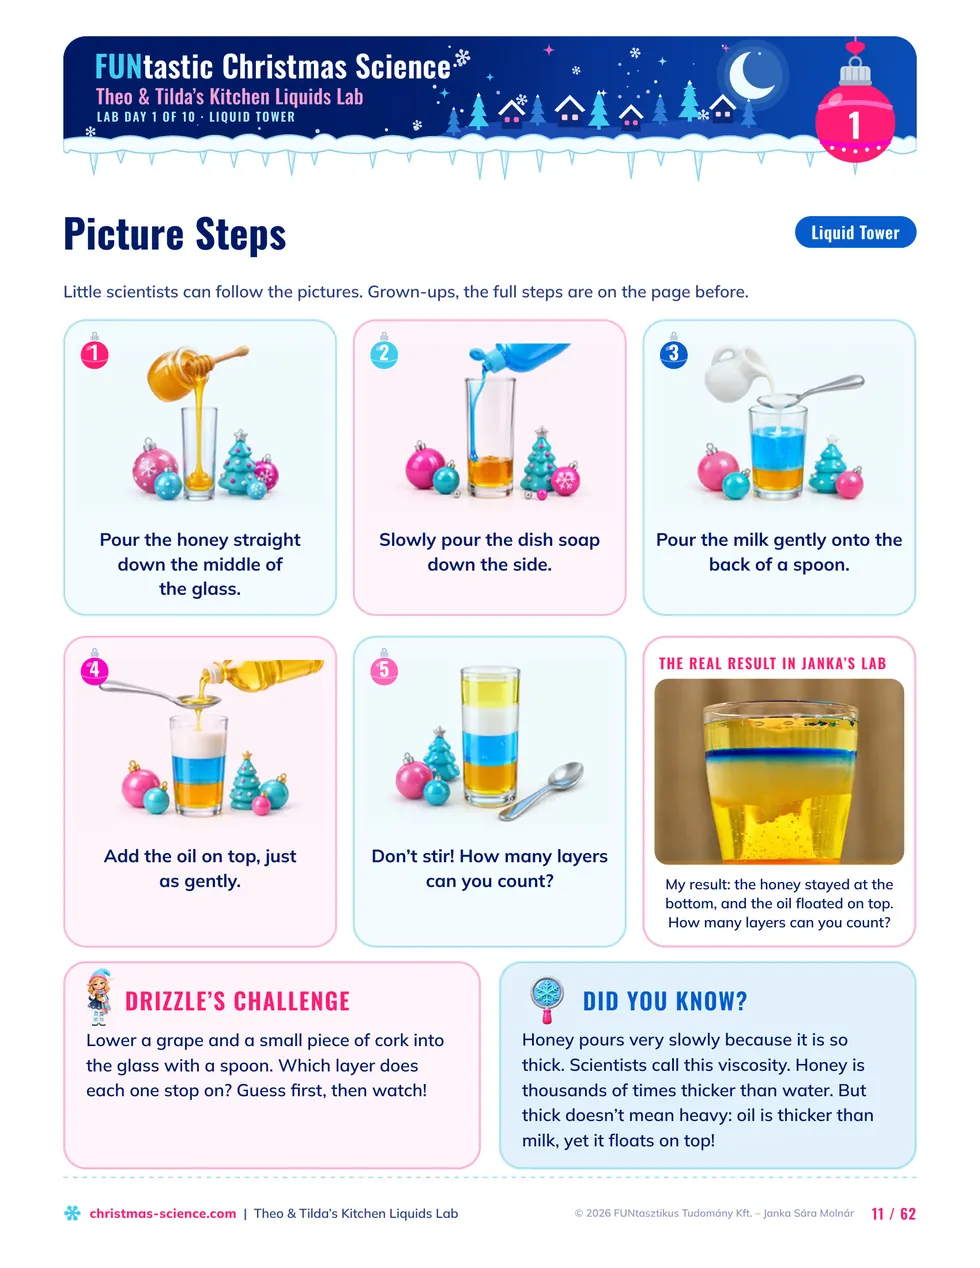
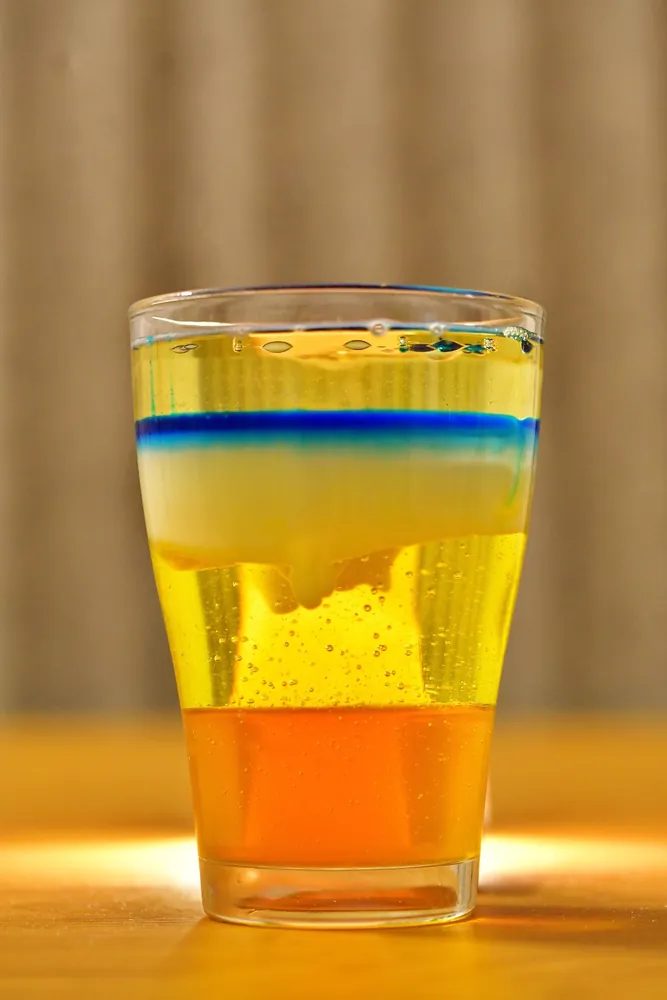
Pour 2 tablespoons each of honey, dish soap, milk, and cooking oil into a tall, narrow glass, one at a time and very slowly. Don’t stir. The honey stays at the bottom, the oil floats on top, and the dish soap and milk stack up in between. This is Lab Day 1, and its story treasure is learning from mistakes.
- Pour the honey straight down the middle of the glass so the sides stay clean.
- Very slowly drizzle the dish soap down the side of the glass.
- Add the milk just as gently, then the oil on top. It’s easier if you pour onto the back of a spoon so the liquid trickles down.
- Don’t stir! Count the layers. Where is the line sharpest?
From my lab: the tricks that make it work
- Use a thick, concentrated dish soap, blue or purple if you can. A colored layer is easy to see. A thin, watery soap is usually more diluted, so it can be almost as dense as milk, and then the milk sinks into it.
- The sharpest line is under the oil. Honey, dish soap, and milk are all water-based, so only their different densities and slow pouring keep them apart. Oil doesn’t mix with water at all.
- Thick doesn’t mean heavy. Ask your child which liquid is the thickest. Honey, of course! Then point at the oil: it is thicker than milk, yet it floats on top. What counts is how heavy a liquid is for its size, and scientists call that density.
- When you’re done, or if the layers mix, don’t pour them down the sink. Oil can clog the pipes. Pour the mix into an old jar and put it in the trash. If the layers mixed, try again, even more slowly.
These tower tricks are worth passing on. Send them to a friend who is planning a rainy-day experiment. Share it
Three questions from the talk card to ask while you look at the glass:
- WONDER Why do you think the honey sank all the way down?
- IMAGINE What would happen if you added a fifth liquid?
- FEEL How did you feel while you poured very, very slowly?
Safety: a grown-up is always there, and nothing from an experiment is food. Don’t taste the layers. Check for milk and honey allergies first, keep the grape and cork away from little mouths, and wipe up oily spills right away.
Kitchen Liquids Lab · instant download
How do the floating egg and the overnight gummy bear experiments work?
Both are about water and what is dissolved in it. Salt makes water dense enough to float an egg, about 3 tablespoons in 1 cup of water, and a gummy bear left in cold water for 12 hours or more soaks up so much water that it grows much bigger. They are for the child who wants to give up after the first try and the child who can’t wait. In the stories, Theo always sinks at swim class, and Tilda can’t wait for her gummy bear to grow. The treasures are perseverance and patience.
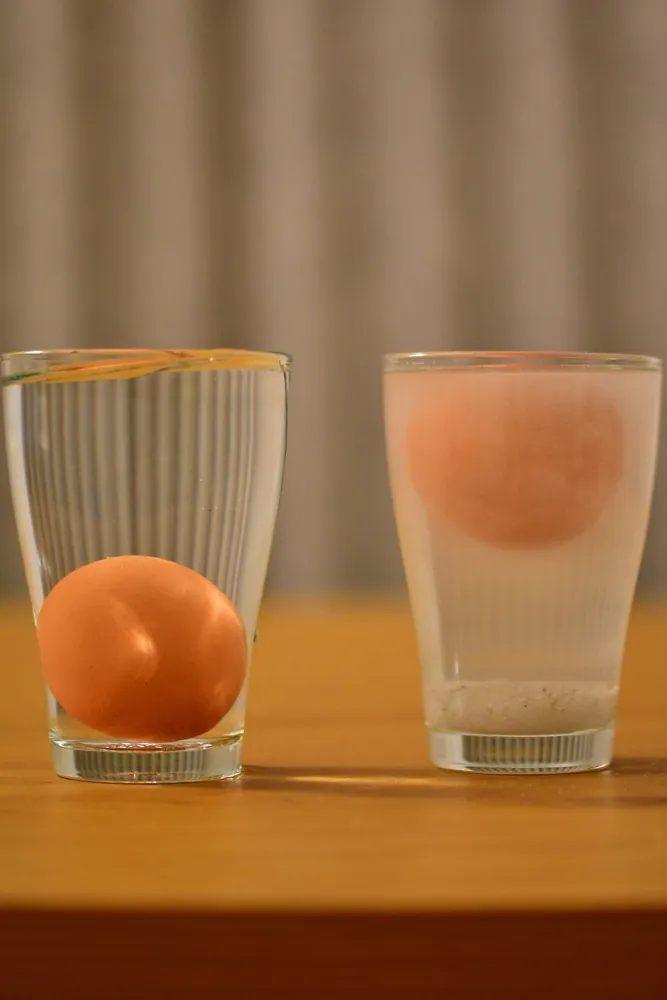
The floating egg experiment (Lab Day 2)
Pour about 1 cup (250 mL) of lukewarm tap water into each of two identical glasses. Stir 3 tablespoons of salt into one until it dissolves. Gently lower a raw egg into each glass with a spoon. In plain water, the egg sinks. In salty water, it rises and floats. If it stays down, take it out, stir in 1–2 more tablespoons of salt, and try again.
From my lab
- Use fresh eggs. As an egg ages, the air pocket inside it grows, and an old egg can float even in plain water. That spoils the surprise.
- Use fine table salt. Flaky salt is lighter by the spoonful, so 3 tablespoons may not be enough.
- Why it works: an egg is a little denser than water, so it sinks. Dissolved salt makes water denser: a cup of salt water weighs more than a cup of plain water. Once the water is denser than the egg, its upward push, the buoyant force, beats the egg’s weight, and the egg floats.
The gummy bear experiment overnight (Lab Day 4)
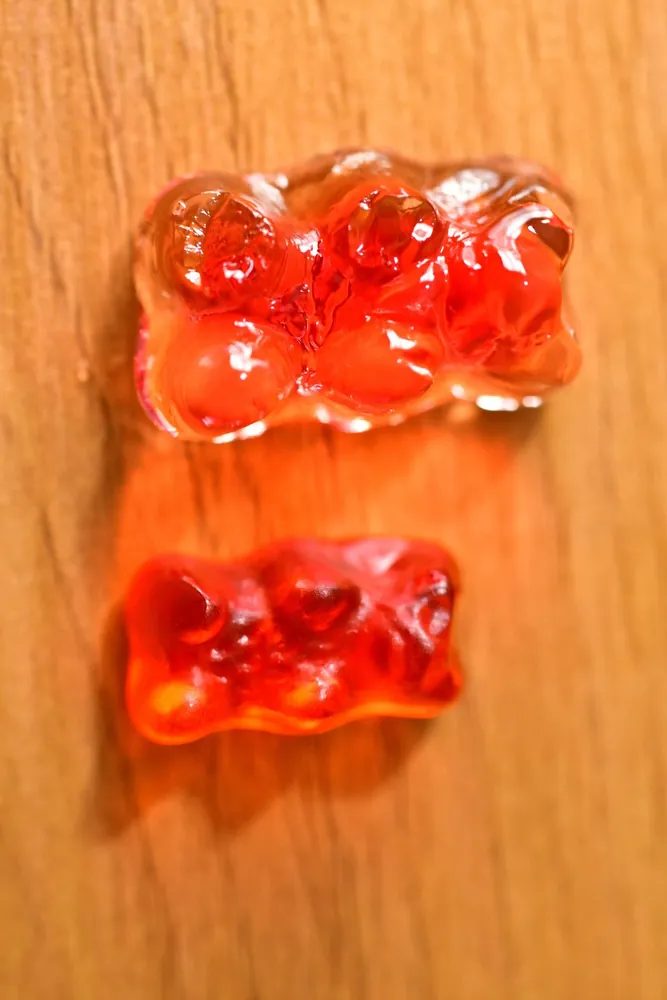
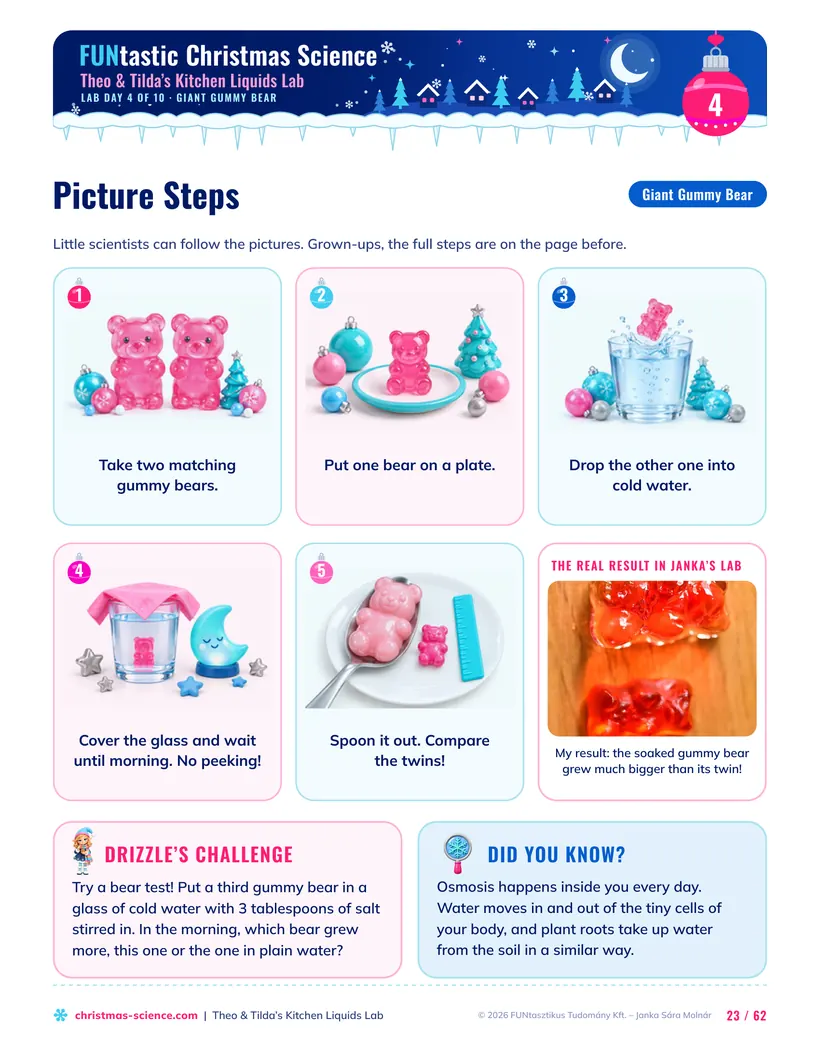
Put one gummy bear on a plate. Drop its twin into a glass of cold tap water, cover the glass to keep out dust, and leave it for at least 12 hours without moving it. In the morning, gently spoon out the very soft bear and set it next to its twin. How much did it grow? What color is it now?
From my lab
- Check the label for gelatin. Gelatin forms a tiny net that doesn’t dissolve in cold water but swells.
- Cold water only. In warm water, the bear dissolves.
- Measure before and after. Lay the bear next to a ruler at bedtime and again in the morning, and write both numbers in the field journal.
- Why it works: the bear has lots of sugar and little water, so water from the glass moves into it, toward where more stuff is dissolved. That is osmosis. Some sugar and coloring seep out, so the bear turns paler and the water gets tinted.
Safety: a grown-up stays close while your child lowers the raw eggs. Don’t drink the very salty water. Wash your hands after touching raw eggs, and throw the eggs away afterward. A child with an egg allergy should not touch raw eggs. Don’t eat the soaked bear. Small candies are a choking hazard, so children under 5 do this only with a grown-up watching.
Starting a gummy bear tonight? Send this to a friend and compare your bears in the morning. Share it
Stories, experiments, picture steps, talk cards, and games
What is an easy Christmas science experiment with oil and food coloring?
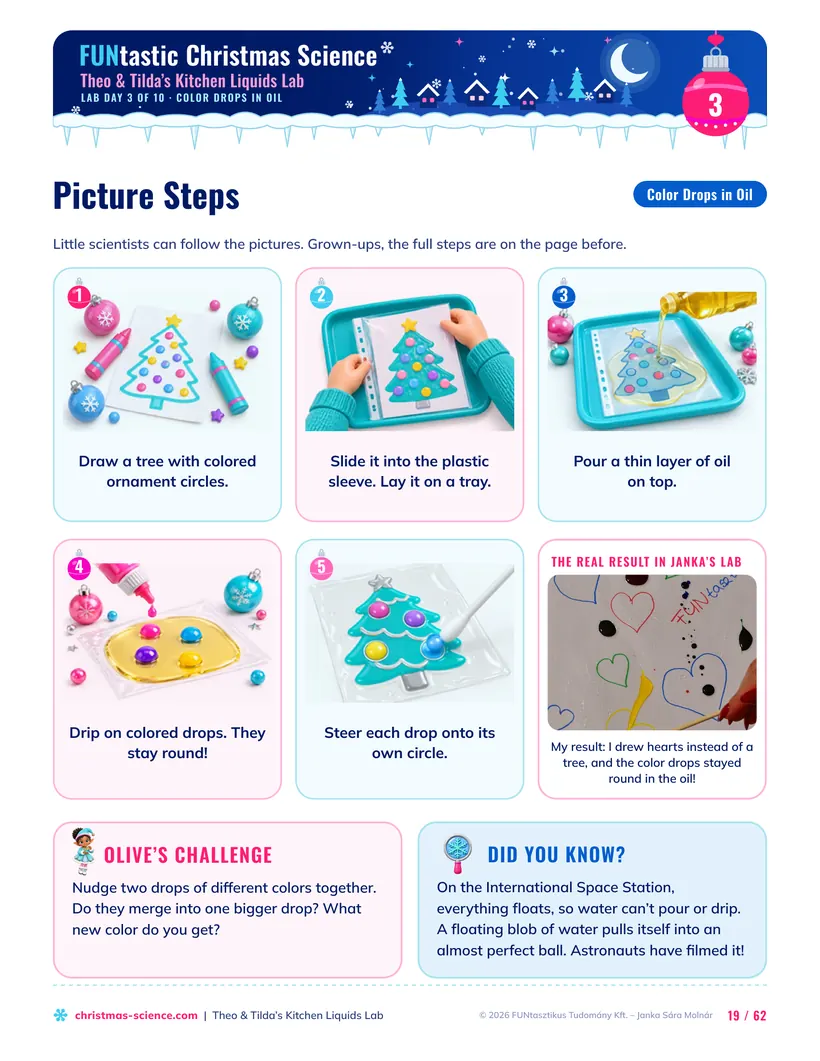
Droplet ornaments on a drawn Christmas tree. Your child draws a tree with colored ornament circles. You slide it into a clear plastic sleeve and pour a thin layer of oil on top. Drops of food coloring stay round in the oil, and your child steers each one onto the circle of the same color with a chopstick. This is Lab Day 3, and its treasure is cooperation.
- Draw a Christmas tree with ornament circles in the same colors as your food coloring.
- Slide the drawing into a clear plastic sleeve (a sheet protector), smooth it out, and set it on a tray.
- Pour a thin layer of cooking oil on top of the sleeve to cover the drawing.
- Drip on the colors. The drops don’t mix with the oil but pull together into little round beads.
- With the blunt end of a chopstick or a cotton swab, gently steer each drop over its own circle. What happens when two drops touch?
From my lab
- Use liquid food coloring, not gel.
- It’s easier with two: one holds the sleeve, the other steers. Then switch! In the story, Theo and Tilda argue about who pushed a drop, until Splash notices that the sleeve stops sliding when someone holds a corner.
- Any drawing works. In my lab, I drew hearts instead of a tree, and the color drops stayed round in the oil.
- Why it works: food coloring is mostly water, and water doesn’t mix with oil. Water molecules pull hard on each other, so each drop pulls itself into a round bead. That’s surface tension. Water is denser than oil, so the drops sink down to the plastic and slide around in the oil.
A gift your child can make: Olive’s Ocean in a Bottle
Oil and water also make a lovely Christmas present. With a grown-up, fill a small, clean plastic bottle halfway with water and add one drop of blue food coloring. Fill the rest with cooking oil, but leave a little air at the top. A grown-up closes the cap tightly and tapes it shut. Tip it slowly from side to side, and the waves roll. Don’t shake it hard, or it turns cloudy for a while. Write a message on the gift tag from the booklet and give it to someone who needs a quiet moment: a grandparent, a friend, or a neighbor.
Know a family making homemade gifts this year? The Ocean in a Bottle is a lovely one to share. Share it
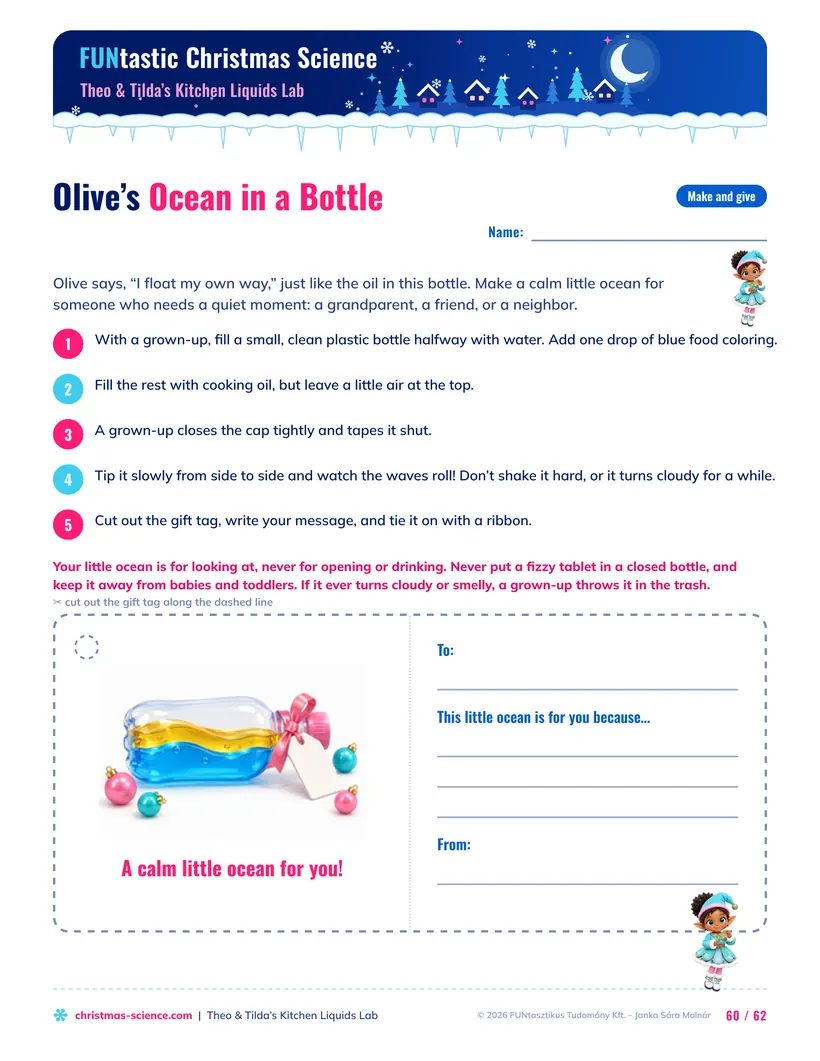
Safety: the ocean bottle is for looking at, never for opening or drinking. If it ever turns cloudy or smelly, a grown-up throws it in the trash. Never put a fizzy tablet in a closed bottle, and keep it away from babies and toddlers.
With the gift tag, coloring pages, and certificate
How do you make a lava lamp without Alka-Seltzer?
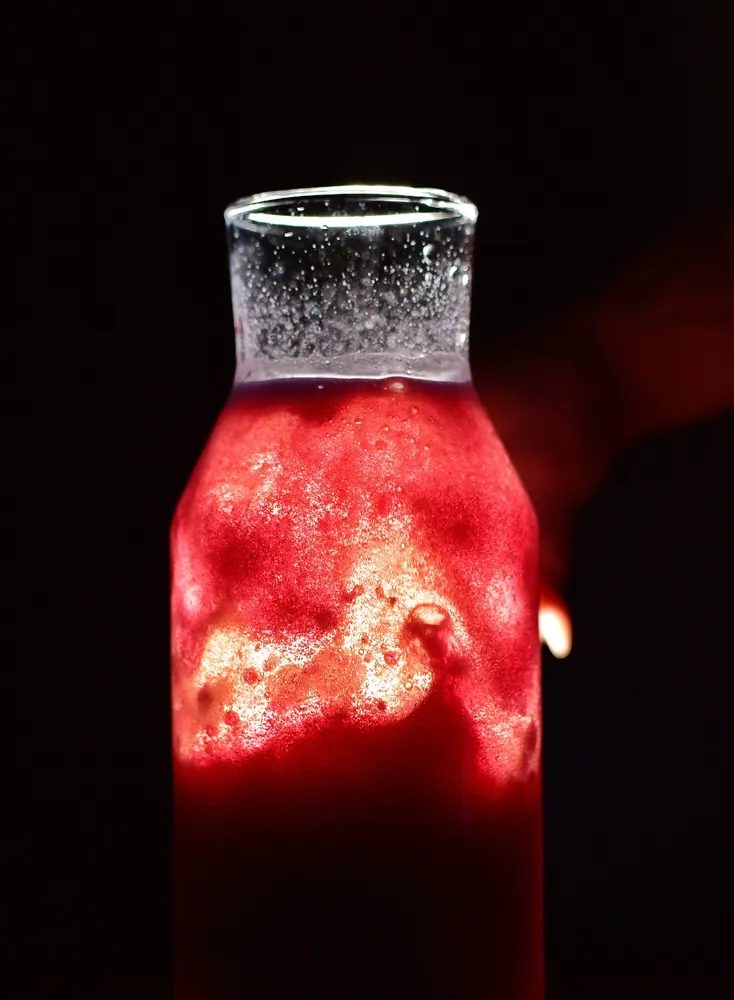
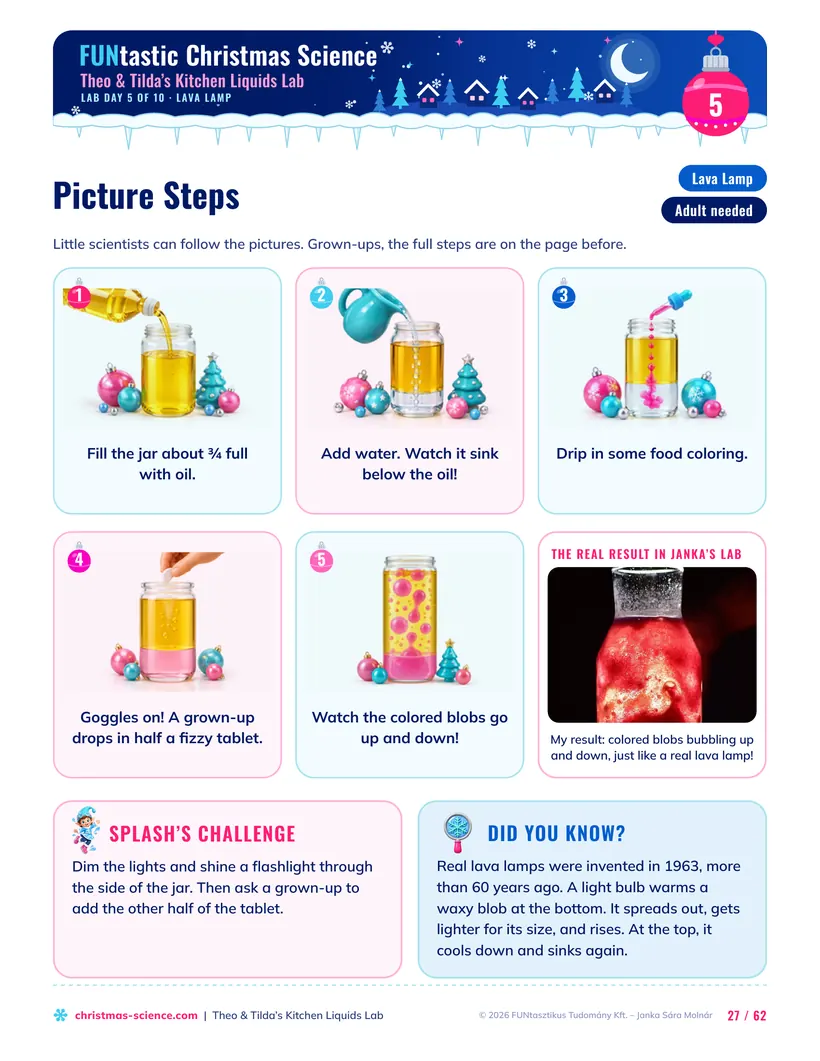
Use a plain fizzy vitamin C tablet. Fill a tall glass or jar about ¾ full with cooking oil, add water until it’s almost full, and drip in some food coloring. Then a grown-up breaks the tablet in half and drops one half in. Colored blobs rise and sink like a real lava lamp. Never put a lid on the jar: the gas needs a way out.
- Fill the jar about ¾ full with oil, then add water until it’s almost full. Watch the water sink below the oil!
- Add a few drops of food coloring. They sink through the oil and dissolve in the water.
- Goggles on! A grown-up breaks the tablet in half and drops in one half. No lid!
- Watch the bubbles carry colored blobs up, then see the blobs sink again. When the bubbling stops, the grown-up can drop in the other half.
From my lab
- Pick a plain fizzy vitamin C tablet: no Alka-Seltzer, no medicine, and no multivitamin with iron. Original Alka-Seltzer contains aspirin, which is a medicine. The tablet stays in grown-up hands, and the rest of the pack stays out of reach.
- Why it works: oil is less dense than water and doesn’t mix with it, so the water collects at the bottom. In water, the tablet makes carbon dioxide gas. A bubble with colored water clinging to it is less dense than the oil, so it rises. At the top, the gas escapes, and the drop sinks back down.
- Turn it into a measurement. Count the blobs that rise in 10 seconds, and time how long the bubbling lasts. There’s a space for both in the field journal.
- Cleaning up: oily leftovers go into an old jar and then into the trash, never down the drain.
In the story, Dad is decorating when his old lava lamp, a gift from Grandpa, slips and smashes. “No big deal,” he says. But Splash notices that Dad has stopped whistling, so the friends make him a new lamp. The booklet asks your child to make theirs for someone they’d like to cheer up. The story’s treasure is empathy.
Did you know? Real lava lamps were invented in 1963. A light bulb warms a waxy blob at the bottom. The warm wax expands, gets lighter for its size, and rises. At the top, it cools down and sinks again.
10 stories · 10 experiments with real photos · games · $3.99
What happens when you add salt to oil and water?
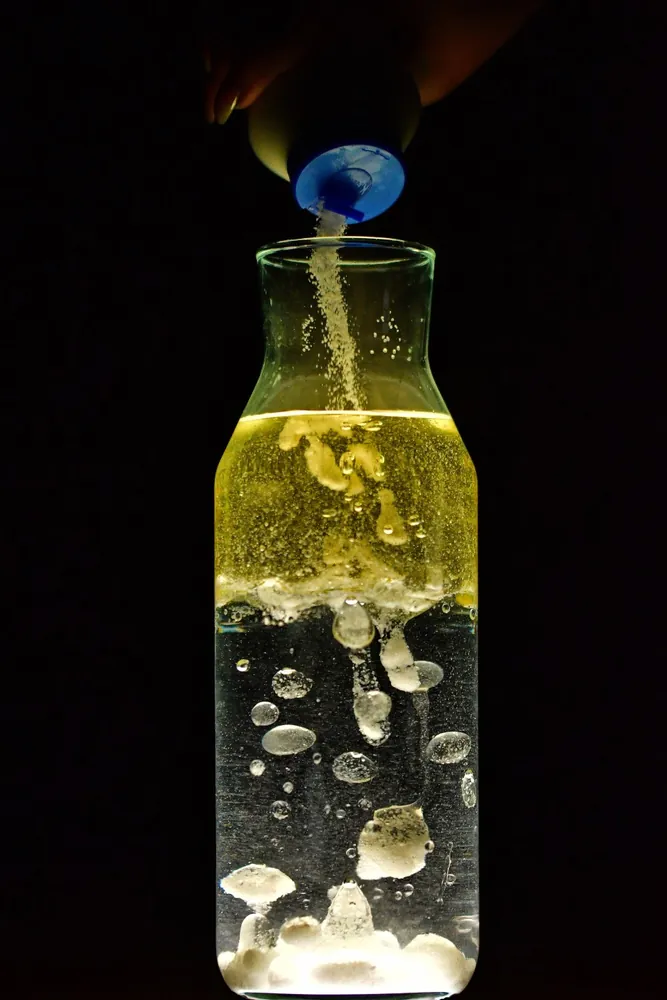
The salt sinks like snow, drags a little oil down with it, and then round oil drops rise back up, one by one. Pour oil onto colored water in a tall glass, sprinkle in salt, and the oil “bubbles” keep floating up as long as you add salt. Some people call it a salt lava lamp. This is Lab Day 6, and its treasure is cooperation.
Salt snow bubbles (Lab Day 6)
Pour 100 mL (a scant ½ cup) of cooking oil into a tall glass, then add water tinted blue, leaving room at the top. The oil floats up on top. Sprinkle in a teaspoon of salt, like falling snow, and watch: the salt sinks, then round oil drops rise from the bottom, one by one. Add more salt to keep the show going.
From my lab
- Why it works: the salt grains are heavier for their size than oil and water, so they sink, and on the way through the oil they drag some oil down with them. At the bottom, the salt dissolves and lets go, and the oil floats back up. The rising “bubbles” are oil drops, not air.
- No drops rising? Give it a minute: the oil comes back up only when the salt on the bottom dissolves. Then sprinkle in another pinch.
- Take turns. One of you sprinkles the salt, and the other counts the oil drops. Then switch! In the story, Theo and Tilda stop quarreling when they put their two ideas together: Tilda’s salt snow falls into Theo’s oil glass.
- Cleaning up: pour everything into an old jar with a lid and put it in the trash, never down the drain.
Does ice melt faster in salt water?
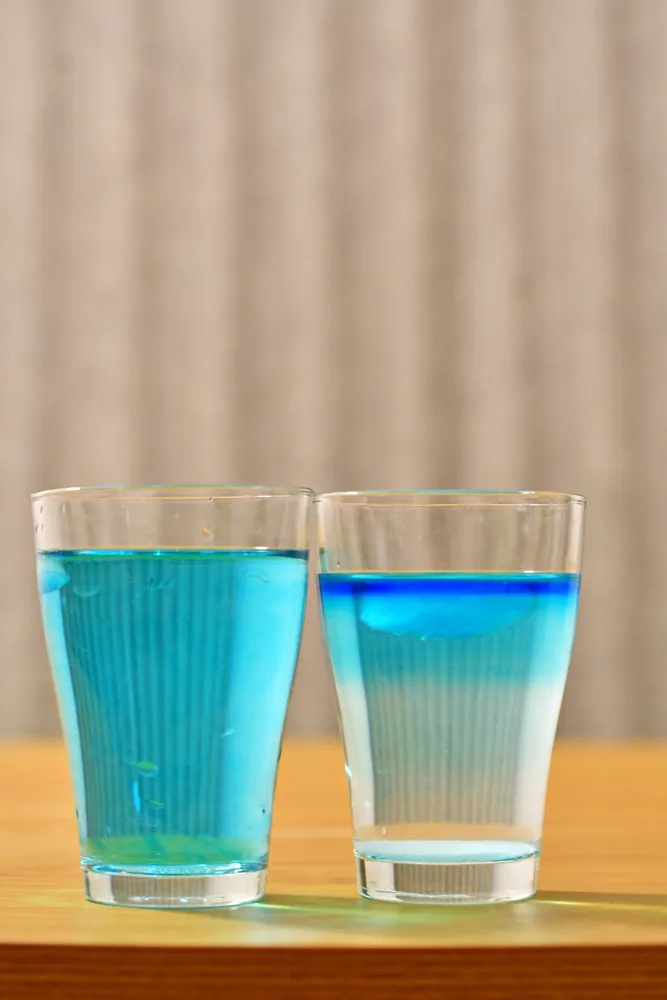
In a still glass, an ice cube melts faster in plain water than in very salty water. Many children (and grown-ups) guess the salty glass, because sidewalks get salted in winter. But the cold meltwater sinks in plain water, so warmer water keeps flowing to the ice, while in salty water it floats on top and wraps the ice like a cold blanket. If you stir both glasses, the salty one wins, so leave them still for this race. This is Lab Day 7, and its treasure is honesty.
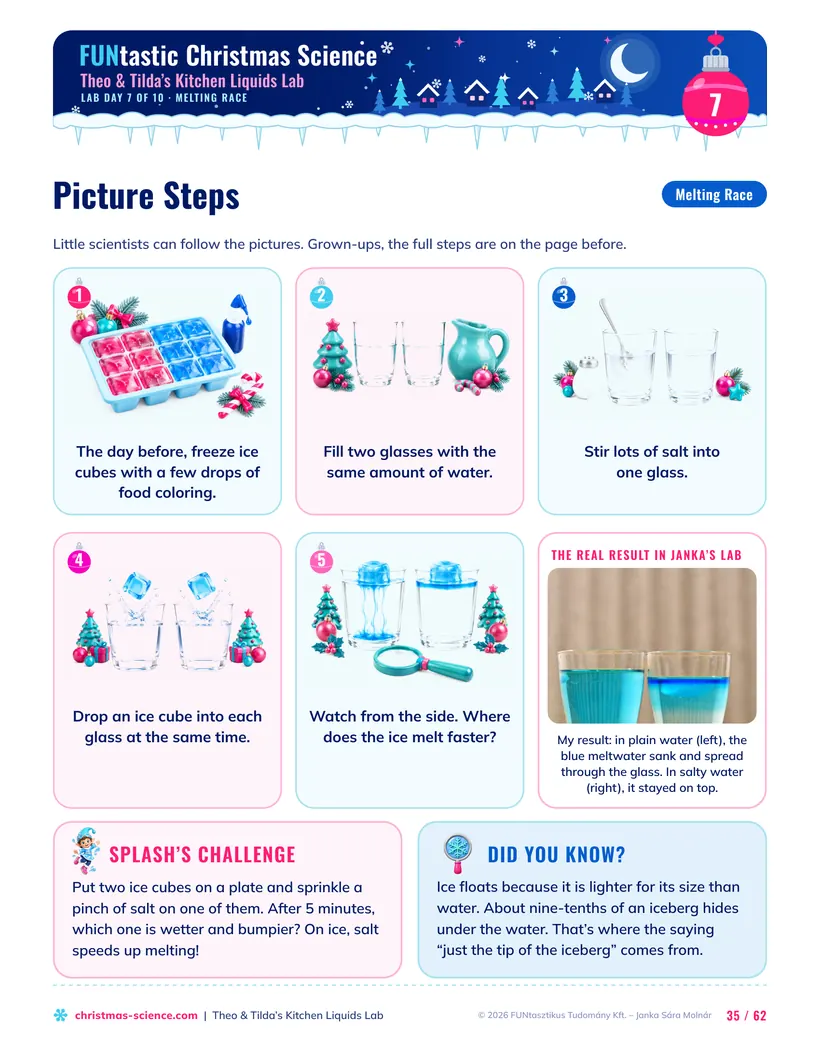
The ice melting race (Lab Day 7)
The day before, freeze water with a few drops of blue or pink food coloring in an ice-cube tray. Pour 250 mL (1 cup) of room-temperature water into each of two identical glasses, and stir salt into one until no more will dissolve, about 6 tablespoons. Ask your child to say their guess out loud. Then drop the same number of matching ice cubes into both glasses at once, and watch from the side.
From my lab
- Watch the color, not only the clock. In plain water, blue streaks pour down from the cube like little waterfalls. In salty water, the blue stays in a thin layer at the top.
- Keep the race fair. Use same-size cubes from the same tray, drop them in at the same moment, and don’t bump the glasses.
- Why it works: melting ice makes cold fresh water. This meltwater is denser than the warmer water around it, so in plain water it sinks, and warmer water flows in. Salty water is much denser, so the meltwater stays on top, and the ice sits in its own cold water.
- The sidewalk is a different story. There, salt dissolves in the thin film of water on the ice, and salty water freezes only below 0 °C (32 °F), so the ice melts. Splash’s challenge in the booklet lets your child test exactly that with two ice cubes on a plate.
- Say your guess out loud. In the story, Tilda bets that salt water wins, and Theo takes the bet, though he already read the answer in a book. While they wait, he tells her the truth, and they put up the star together.
Safety: don’t drink the very salty water, and keep ice cubes away from little mouths. Salty water and colored water can go down the sink with plenty of running water, but oily leftovers go in the trash.
Know a child who is sure that salt melts ice faster? Send this to their family and let them test it. Share it
62 pages · picture steps, talk cards, and a field journal · $3.99
Why don’t the colors mix in the candy rainbow experiment?
The sugary, colored water is heavier than plain water, so each color slides along the plate as its own stripe, and neighboring stripes mix only very slowly. Lay small candies with colored shells in a ring on a white plate and pour water into the middle: the colors swim toward the center and make a striped star. Many people know it as the Skittles experiment. This is Lab Day 8, and its treasure is acceptance.
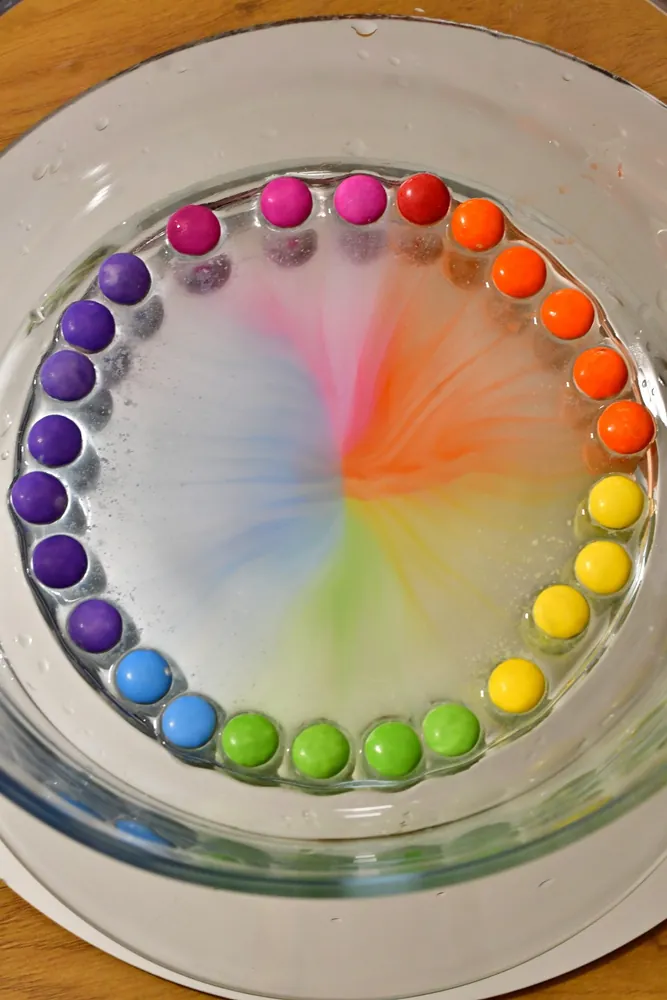
The candy rainbow (Lab Day 8)
Lay about 30 small round candies with colored shells in a ring on a flat white plate, in rainbow order or taking turns with everyone’s favorite colors. Gently pour water into the middle, just enough to cover the candies, and don’t move the plate. The colors leave the candies and swim to the middle.
From my lab
- Why the stripes stay apart: the sugar and coloring dissolve, and the sugary, colored water is denser than plain water, so it slides along the bottom of the plate toward the middle. Neighboring stripes are about equally sugary, so they don’t push into each other. They mix only by diffusion, which is very slow, so the edges stay sharp for a long time.
- Muddy colors? Pour slowly into the middle, only enough to cover the candies, and don’t move or tilt the plate.
- Let everyone pick a color. In the story, Tilda wants only pink candies, until she sees that Theo wears the pink scarf she gave him every day, though his favorite is purple. Their pink-and-purple star shows the story’s treasure: acceptance.
Safety: read the candy labels for allergens first, and don’t eat the candies from the plate. For children under 5, small candies are a choking hazard.
How does the walking water experiment work?
Water climbs paper towel strips by capillary action: it sticks to the paper’s fibers and creeps up the tiny gaps between them. Link glasses of colored water with folded paper towel strips, and in the middle of each strip, two colors meet and mix into a new one. This is Lab Day 9, and its treasure is generosity.
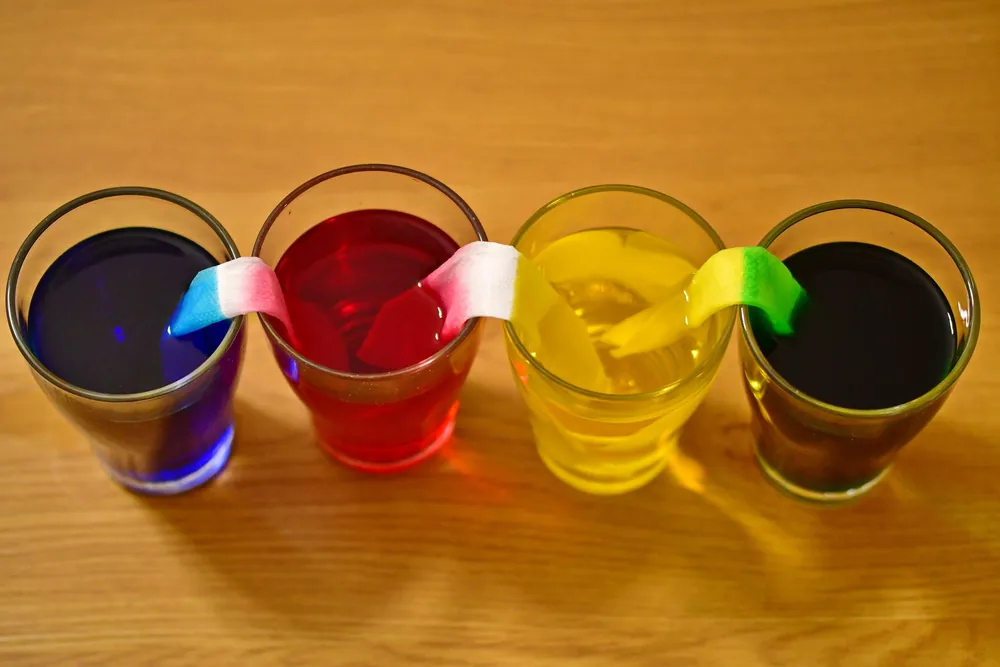
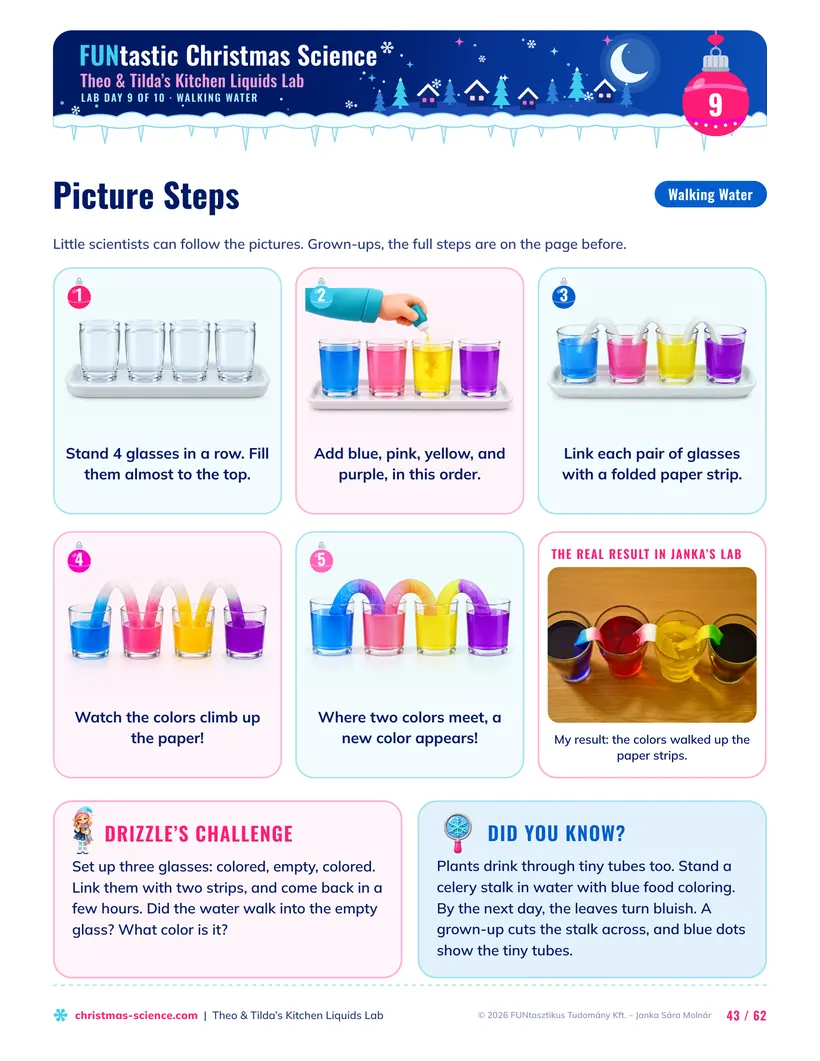
The walking water experiment (Lab Day 9)
- Stand 4 glasses in a row on a tray and fill each almost to the top with water.
- Add blue, pink, yellow, and purple food coloring, one color per glass, in this order.
- Fold 3 paper towel sheets lengthwise into narrow strips, and use each one to link two neighboring glasses, with one end dipping into the water of each glass.
- Watch the colors creep up the paper. In about 30 minutes, blue and pink make purple, and pink and yellow make orange.
From my lab
- Why it works: paper is made of thin fibers with tiny gaps between them. Water sticks to the fibers and creeps up the gaps, even against gravity. Scientists call this capillary action. A sponge soaks up a spill the same way.
- Nothing climbing? Fill the glasses almost to the top, and check that each end of every strip dips into the water.
- Make it a wreath. Set the 4 glasses in a ring, pink and blue in turns, and link each pair of neighbors. In the story, Bonnie shares half of her pink coloring with Tilda, and the friends make a walking-water Advent wreath.
- Leave a glass empty. Colored, empty, colored, linked with two strips: in a few hours, the water walks into the empty glass. Drizzle’s challenge in the booklet asks your child to guess its color first.
Safety: food coloring stains, so work on a tray, and put the wet paper strips in the trash at the end.
10 stories · 10 experiments with real photos · games · $3.99
How do you make a bouncy egg with vinegar?
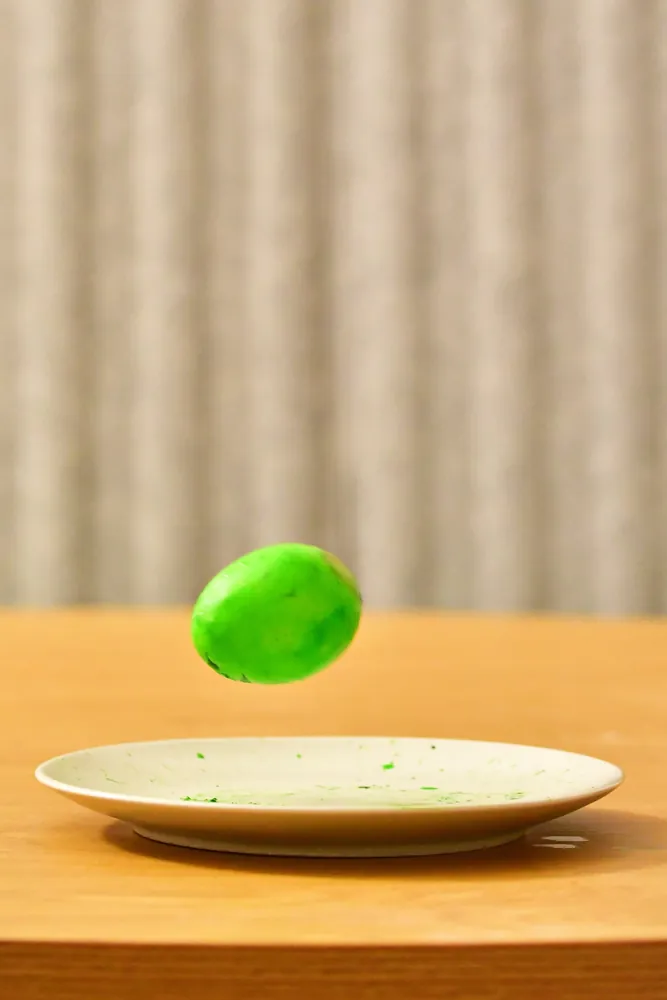
Soak a raw egg in white vinegar for 2–3 days. With goggles on, a grown-up pours the vinegar and, the next day, swaps in fresh vinegar. The shell dissolves, and a thin, stretchy skin holds the egg together, so it bounces, but only from low down, no higher than 5 cm (2 in). Some people call it the naked egg experiment. This is Lab Day 10, and its treasure is patience.
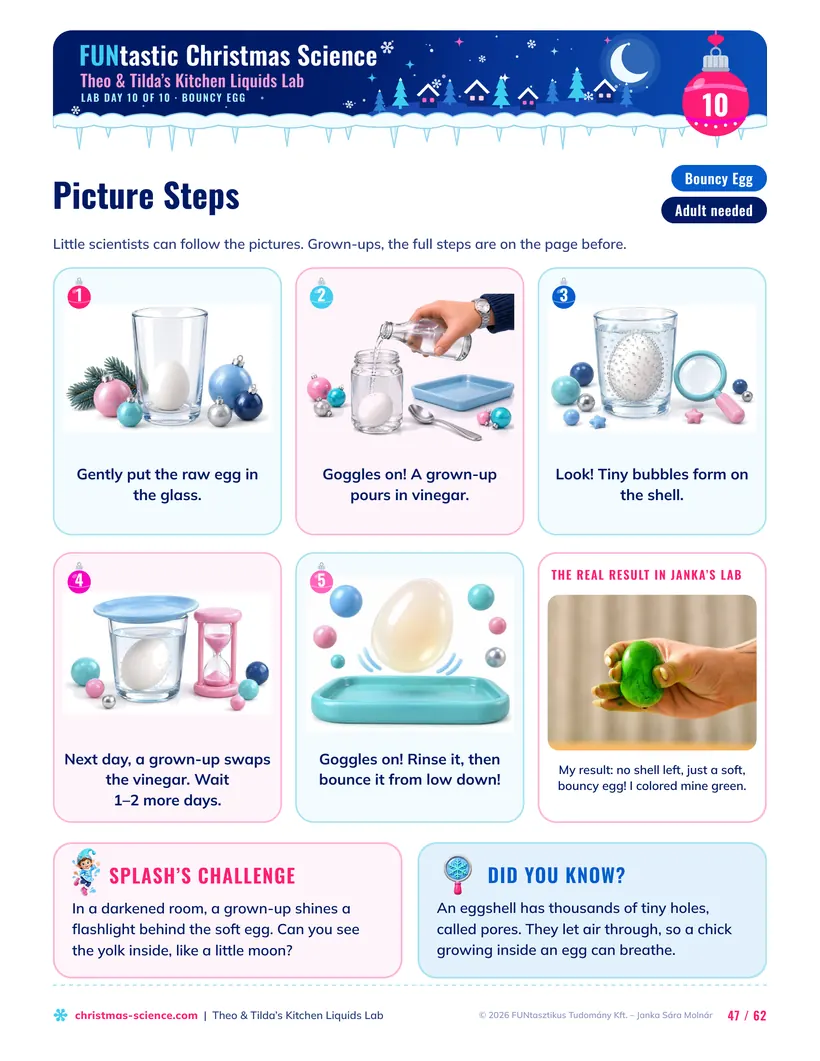
- Gently place the raw egg in a clear glass. Goggles on! A grown-up pours in vinegar to cover it. Add a drop of food coloring if you like.
- Look for tiny bubbles on the shell, and cover the glass loosely with a saucer, never airtight.
- The next day, a grown-up swaps in fresh vinegar (goggles on!). Wait 1–2 more days, until the shell is gone.
- Lift the egg out with a spoon, rub off any soft bits of shell under cold water. Goggles on! Bounce it gently above a tray, from no higher than 5 cm (2 in).
From my lab
- Why it works: eggshell is mostly calcium carbonate, like limestone. The acid in vinegar dissolves it and gives off carbon dioxide, the tiny bubbles on the shell. The membrane under the shell doesn’t dissolve. Water seeps in through it (osmosis, just like in the gummy bear), so the egg even swells a little.
- Shell bits left after 3 days? A grown-up swaps in fresh vinegar, and you wait one more day.
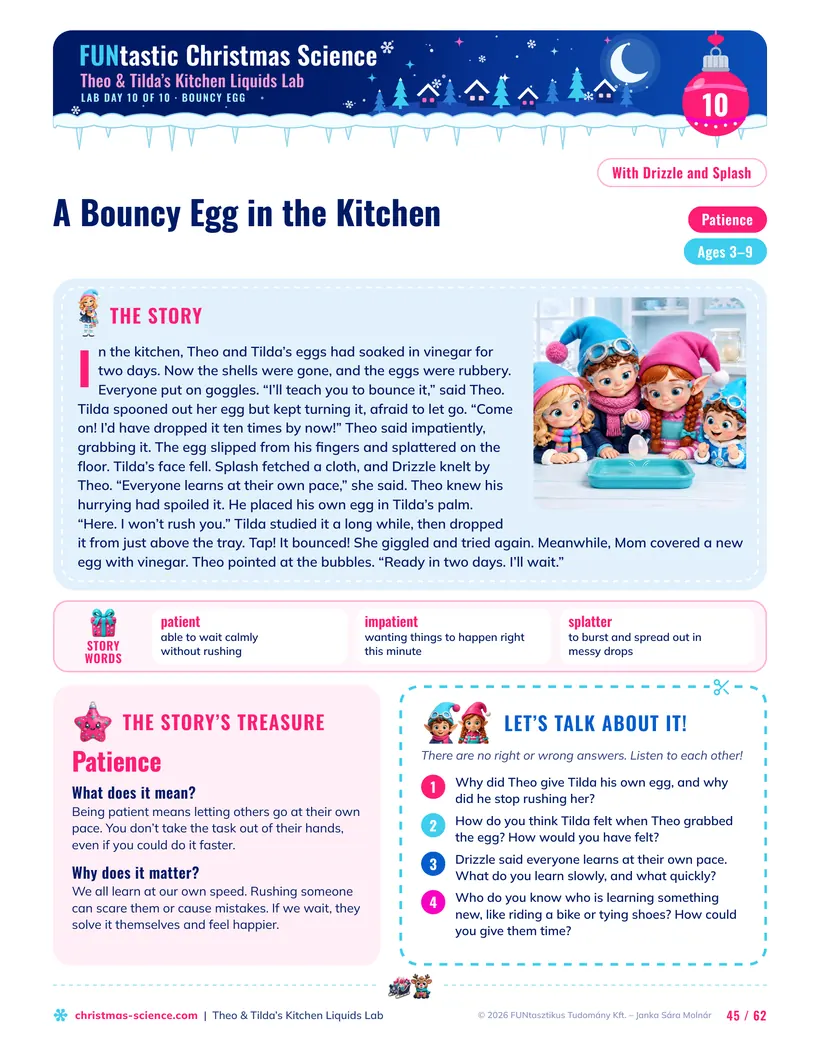
- Start very low. Bouncing takes practice. In the story, Theo grabs Tilda’s egg to show her how, and it splatters on the floor. Then he gives her his own egg and waits. Let your child try at their own pace.
- Shine a light through it. In a darkened room, a grown-up holds a flashlight behind the soft egg. You can see the yolk inside, like a little moon.
Safety: everyone wears goggles while the vinegar is poured and swapped and while the egg bounces. The egg is still raw inside: don’t eat it, wipe up a burst egg with hot, soapy water, put the egg in the trash, and wash your hands. A child with an egg allergy should not touch raw eggs.
Starting a bouncy egg this weekend? Send this to a friend and bounce your eggs together in a few days. Share it
62 pages · ages 3–9 · $3.99 · US Letter and A4
Know a family who’d love this?
Splash stayed calm when the tower went murky. If you liked that, send this post to a family who’d love a liquid tower on the kitchen table this weekend.
COPY THIS MESSAGE
Paste it into a parent group chat, or send it to a friend.
Look what I found! Ten kitchen science experiments for kids with things we already have: a liquid tower, a lava lamp, an ice melting race, walking water, a bouncy egg, and more. Exact amounts and a physicist’s tips for each one. www.christmas-science.com/blog/kitchen-science-experiments-for-kids
Questions parents ask
What kitchen science experiments can a 3-year-old do?
All ten Kitchen Liquids Lab experiments are for ages 3 to 9. Little ones can do the pouring and dripping themselves in the liquid tower, the color drops, the salt snow bubbles, and the walking water. On Lab Days 2 and 10, a grown-up stays close while they handle the raw eggs, and only a grown-up pours the vinegar. On Lab Day 5, they watch while a grown-up handles the fizzy tablet. For children under 5, use plastic cups where you can, and keep small things like gummy bears, candies, ice cubes, grapes, and tablet pieces away from mouths.
Can you use a vitamin C tablet for a lava lamp experiment?
Yes. Use a plain fizzy vitamin C tablet. Fill a jar about ¾ full with oil, add water until it’s almost full, and drip in food coloring. Put on goggles, then a grown-up drops in half a tablet. No lid, and no Alka-Seltzer, medicine, or multivitamin with iron.
How long does the gummy bear experiment take?
At least 12 hours. Start it in the evening in cold tap water, cover the glass, and don’t move it. Warm water dissolves the bear.
Why does an egg float in salt water?
Dissolved salt makes water denser. Once the salt water is denser than the egg, the water’s upward push, the buoyant force, beats the egg’s weight, and the egg floats. About 3 tablespoons of table salt in about 1 cup (250 mL) of water is a good start.
Does ice melt faster in salt water or in fresh water?
In fresh water, as long as nobody stirs the glass. The cold meltwater from the ice is denser than the room-temperature water around it, so it sinks, and warmer water flows in to melt the ice. In very salty water, the meltwater is lighter than the salt water, so it stays on top and wraps the ice like a cold blanket. Salt on an icy sidewalk is different: there it dissolves in the thin film of water on the ice, and salty water freezes only below 0 °C (32 °F), so the ice melts.
How long does the walking water experiment take?
With every glass full, the colors meet in the middle of the paper strips in about 30 minutes. If you leave an empty glass between two colored ones, the water needs a few hours to walk into it, so start in the morning.
How long does it take to make a bouncy egg?
Two to three days. With everyone in goggles, a grown-up covers a raw egg with white vinegar, covers the glass loosely, and swaps in fresh vinegar the next day. When the shell is gone, rinse the egg and, still in goggles, bounce it from no higher than 5 cm (2 in). It is still raw inside, so it goes in the trash afterward, and everyone washes their hands.
Theo & Tilda’s Kitchen Liquids Lab
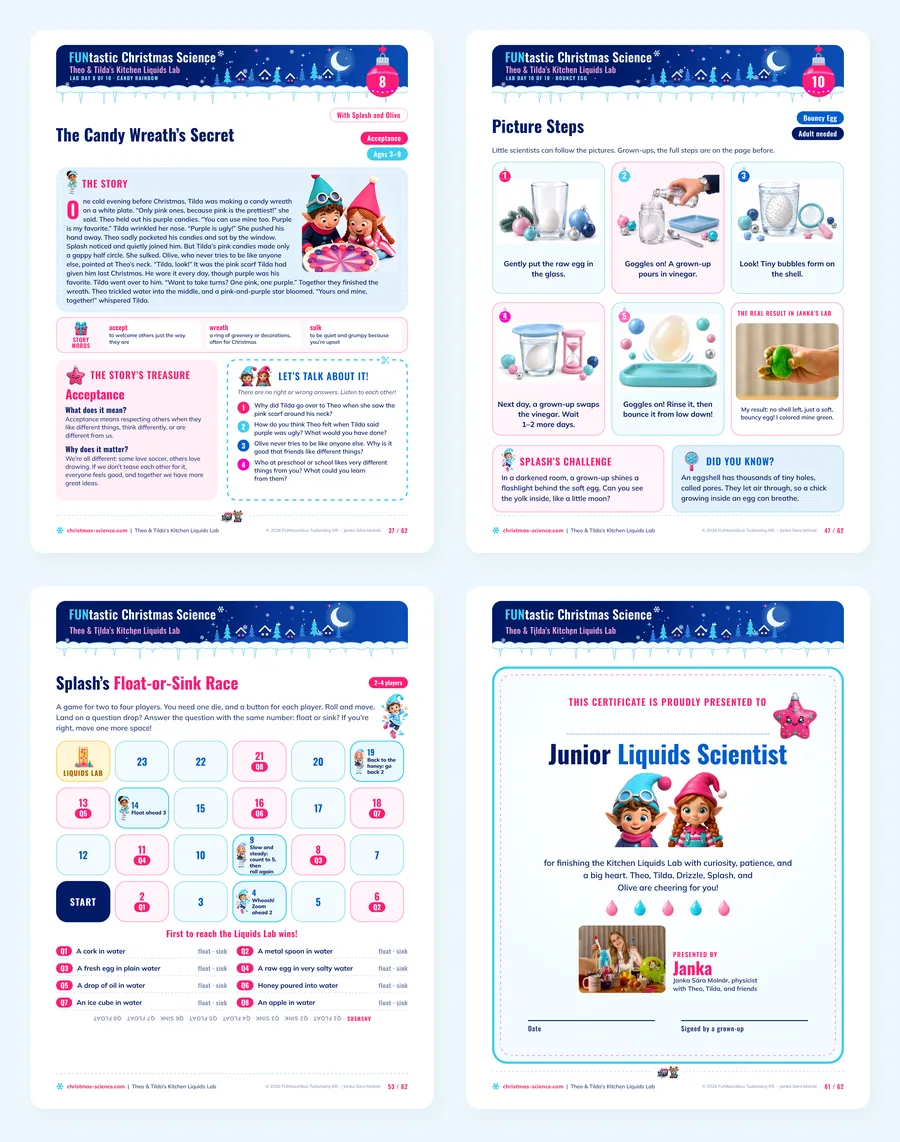
62 pages for ages 3–9, $3.99: ten stories, ten experiments with photos from my lab, picture steps, science talk cards, a field journal, games, collector cards, coloring pages, and a certificate. You get it in US Letter and A4.
Get the Kitchen Liquids LabTheo & Tilda’s Christmas Science Adventure
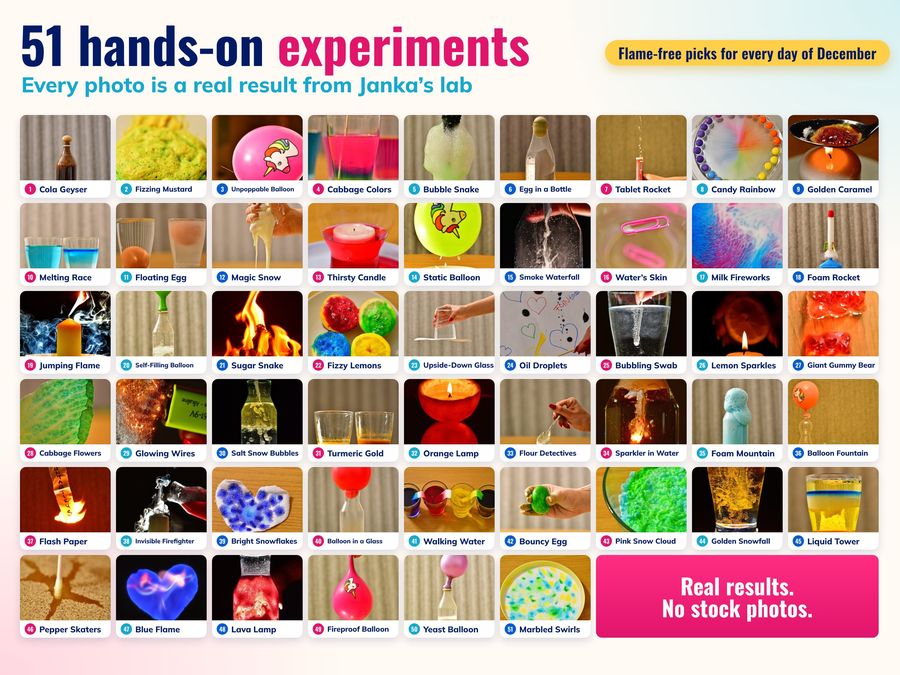
Theo and Tilda have 41 more adventures waiting in the big book: 129 pages with 51 read-aloud stories and 51 kitchen experiments with real photos, a 24-day December plan plus 27 more adventures for January.
Launch price until December 24: $11.99 for the book, or $13.99 with the 68-page Activity Pack.
See all 51 experiments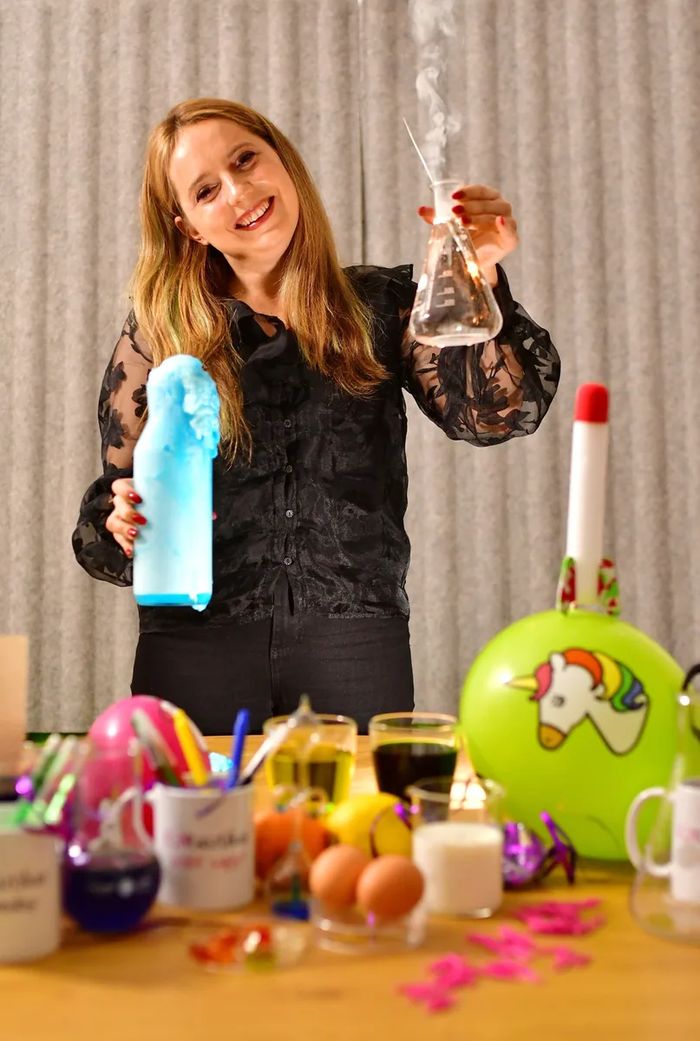
About Janka
Janka Sára Molnár is a physicist and award-winning science communicator from Hungary, and the founder of FUNtastic Christmas Science. As a high school student, she spent years building particle detectors and took them to CERN several times. For almost 15 years, she has run several hundred science shows for children and families.
Her awards include the Role Model Award in Innovation of Nők Lapja (2026), the Women of Excellence Award of Szakmai Elit (2026), the Rising Star Award at the Creator Awards (2024), and the Juhari Zsuzsanna Blog of the Year Award of the Hungarian Academy of Sciences (2023). She was featured in “FORBES NEXT: 30 talented young people under 30 from the world of science – 2018” and won the HBO Max reality series A Híd (The Bridge). Her mission is to show children and grown-ups that science is easy to love, easy to understand, and part of everyday life.